 网硕互联帮助中心
ZLMediaKit 是啥?
ZLMediaKit是国人开发的开源C++流媒体服务器,同SRS一样是主流的流媒体服务器。 ZLToolKit是基于C++11的高性能服务器框架,和ZLMediaKit是同一个作者,ZLMediaKit正是使用该框架开发的。
官网
ZLMediaKit开源地址:https://github.com/ZLMediaKit/ZLMediaKit ZLToolKit开源地址:https://github.com/ZLMediaKit/ZLToolKit
国内登陆github非常不稳定,如下是ZLMediaKit对应的gitee 网址
ZLMediaKit: 实现RTSP/RTMP/HLS/HTTP协议的轻量级流媒体框架,支持大并发连接请求
ZLMediaKit源码分析的一篇文章
原文链接:https://blog.csdn.net/weixin_40355471/article/details/135422631
1.如何使用 ZLMediaKit 搭建RTSP 服务器
1.国内⽤户推荐从同步镜像⽹站gitee下载源码
git
clone
–depth
1
https://gitee.com/xia-chu/ZLMediaKit.git
cd
ZLMediaKit
#
千万不要忘记执⾏这句命令
git
submodule update
–init
强烈建议使⽤ubuntu16或更新版本编译ZLMediaKit,macOS是次选推荐平台,最不推
荐的是centos6.*或windows平台。
本地实验会在 ubuntu上实现。相关截图放在后面
2.编译相关
2.1 编译器版本要求
ZLMediaKit采⽤了C++11的语法和库,要求编译器⽀持完整的C++11标准,亦即:
linux上要求gcc 版本 >= 4.8(4.7应该也能⽀持)
macOS上clang >= ???(我也不知道,估计⼤部分不会遇到这个问题)
windows 上visual stuido >= 2015(vs2013某些版本也能编译通过,如果怕麻烦建议直接vs2017)
在ubuntu上查看g++版本
g++ –version
2.2 安装编译器
如果你是debian系操作系统(包括ubuntu系⽤户),⼀般⾃带的gcc版本够新,你可以这样安装gcc编译 器:
sudo
apt-get install build-essential
你正在尝试在Ubuntu或其他基于Debian的Linux发行版上安装
build-essential包。
build-essential是一个包含编译软件所需要的基本包集合的元包。它会安装GCC、G++、Make等基本工具,这些工具是编译大部分源代码所必需的
2.3 安装cmake
ZLMediaKit采⽤cmake来构建项⽬,通过cmake才能⽣成Makefile(或Xcode/VS⼯程),所以必须先安装 cmake才能完成后续步骤。
如果你是debian系操作系统(包括ubuntu系⽤户),⼀般⾃带的cmake版本够新,你可以这样安装
cmake
sudo
apt-get install cmake
2.4 依赖库
2.4.1 依赖库列表
ZLMediaKit可选依赖⼀些第三⽅库,这些库都不是必选的;在构建ZLMediaKit时,cmake能查找系统路 径中的这些库,并根据安装情况选择是否开启相关特性,你可以选择安装这些依赖并启⽤相关特性:
openssl
flash player在播放rtmp时,采⽤的是复杂握⼿模式,如果不安装该库,flash player将播放不了
zlmediakit 提供的rtmp url. 同时ZLMediaKit的https/rtsps相关功能需要使⽤openssl才能开启。
ffmpeg
zlmediakit可以通过fork ffmpeg进程的⽅式实现多种协议的拉流,编译时不需要安装FFmpeg。
sdl、avcodec、avutil
这3个库供ZLMediaKit的test_player测试程序使⽤,你通常不需要安装这3个库。
2.4.2 安装依赖库
Debian系(包括ubuntu)系统下安装依赖的⽅法:
#
除了
openssl,
其他其实都
可以不安装
sudo apt update sudo apt-get install openssl
sudo
apt-get install libssl-dev
sudo
apt-get install libsdl-dev
sudo
apt-get install libavcodec-dev
sudo
apt-get install libavutil-dev
sudo
apt-get install ffmpeg
2.5 构建和编译项⽬
在linux或macOS系统下,你应该这样操作:
1 cd ZLMediaKit
2 mkdir build
3 cd build
4 #macOS下可能需要这样指定openss路径:cmake .. -DOPENSSL_ROOT_DIR=/usr/lo
cal/Cellar/openssl/1.0.2j/
5 cmake ..
6 make -j4
3 运⾏
ZLMediaKit⼯程主要⽣成3种⼆进制⽬标⽂件,他们的⽣成的路径在release⽬录下,这些⽬标⽂件主要分为:
MediaServer进程这是ZLMediaKit作为服务器的主进程,该进程可以在免去开发的情况下直接作为测 试流媒体服务器使⽤,如果你需要更复杂的业务逻辑,可以通过
Web HOOK
和
RESTful API
实现,同时 你可以通过
配置⽂件
控制其参数。
1 cd ZLMediaKit/release/linux/Debug
2 #通过-h可以了解启动参数
3 ./MediaServer -h
4 #以守护进程模式启动
5 ./MediaServer -d &
2.本地实验的截图和说明
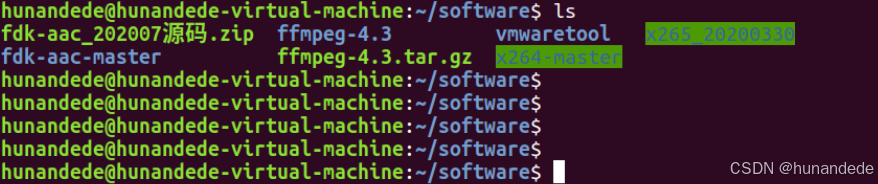
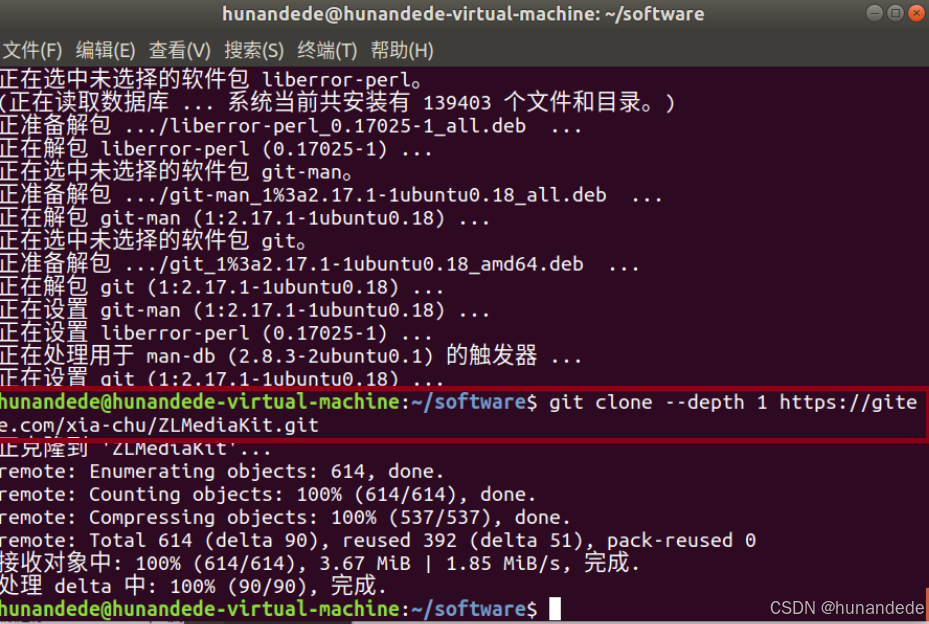
下载 ZLMediaKit
git
clone
–depth
1
https://gitee.com/xia-chu/ZLMediaKit.git
cd
ZLMediaKit
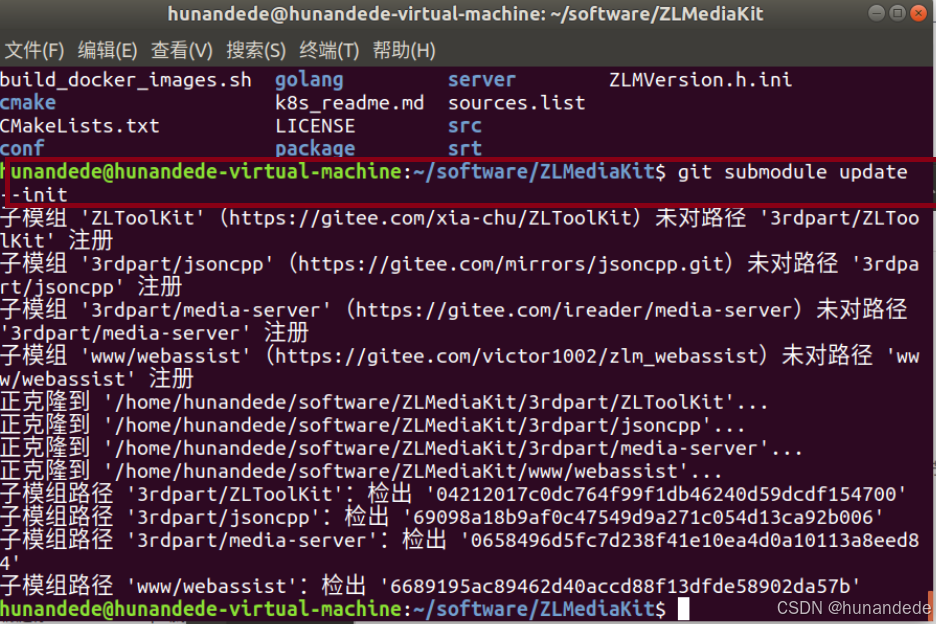
#
千万不要忘记执⾏这句命令
git
submodule update
–init
cd ZLMediaKit

在ubuntu上查看g++版本

linux上要求gcc 版本 >= 4.8(4.7应该也能⽀持),本地安装的ubuntu 是符合标准的,因此
安装编译器
如果你是debian系操作系统(包括ubuntu系⽤户),⼀般⾃带的gcc版本够新,你可以这样安装gcc编译 器:
sudo
apt-get install build-essential
build-essential是一个包含编译软件所需要的基本包集合的元包。它会安装GCC、G++、Make等基本工具,这些工具是编译大部分源代码所必需的

安装cmake
ZLMediaKit采⽤cmake来构建项⽬,通过cmake才能⽣成Makefile(或Xcode/VS⼯程),所以必须先安装 cmake才能完成后续步骤。
如果你是debian系操作系统(包括ubuntu系⽤户),⼀般⾃带的cmake版本够新,你可以这样安装
cmake
sudo
apt-get install cmake

安装依赖库,这里只是安装了openssl
sudo apt update sudo apt-get install openssl


构建和编译项⽬
1 cd ZLMediaKit
2 mkdir build
3 cd build
4 #macOS下可能需要这样指定openss路径:cmake .. -DOPENSSL_ROOT_DIR=/usr/lo
cal/Cellar/openssl/1.0.2j/
5 cmake ..
6 make -j4

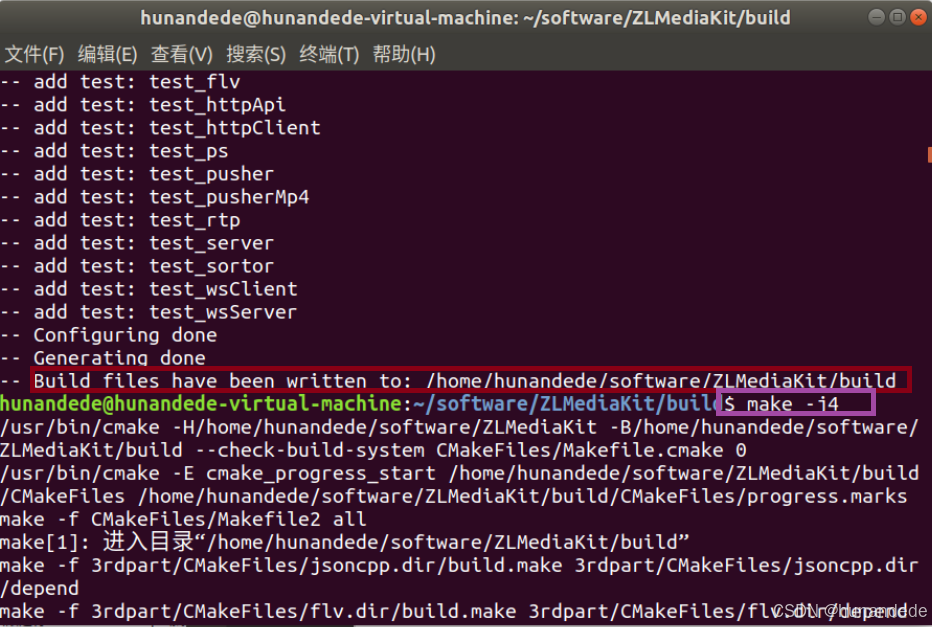
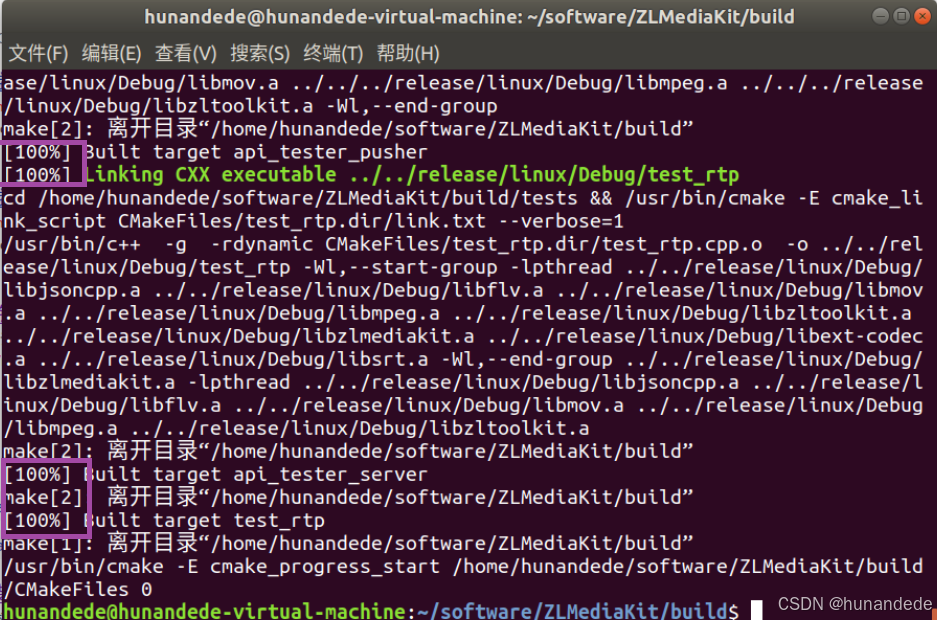
挨个检查是不是100% build 成功,
3.运行MediaServer
./MediaServer ./MediaServer -d ./MediaServer -d & nohup ./MediaServer -d &
- 注意:
- 如果你启动MediaServer后需要关闭shell,用第三种方式,否则关闭shell会导致MediaServer一起被关闭。
- 如果你会使用到FFmpeg相关功能,你应该这样启动程序nohup ./MediaServer -d &,否则在fork FFmpeg进程时会导致MediaServer进程挂起。
- -d(–daemon):是否以守护程序的方式启动,守护进程只做一件事,就是判断子进程(这个才是干活的进程)是否已经退出,退出后会不断尝试重启子进程
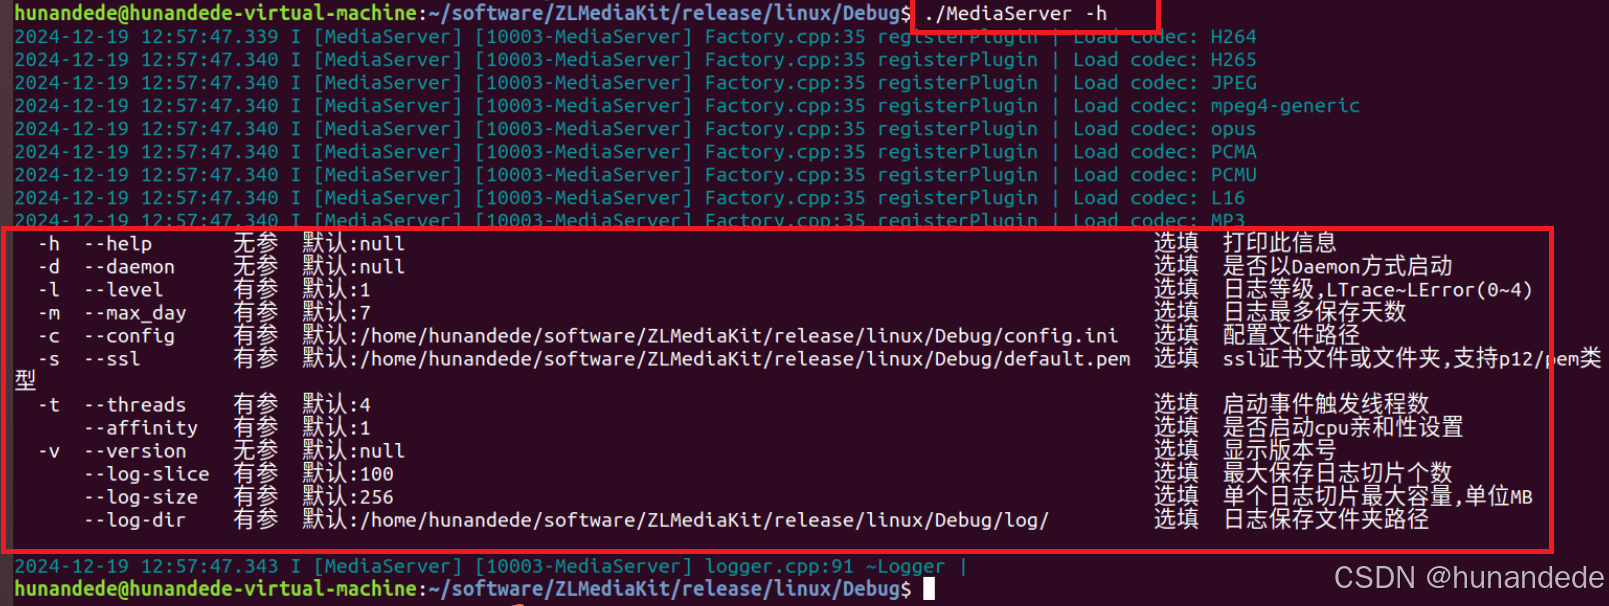
- -l(–level): 指定日志打印等级,赋值范围为0~4,等级越高,日志越少。
- -m(–max_day): 日志文件保存天数,程序本次运行期间的日志如果超过这个天数,就会被删除。
- -c(–config): 指定配置文件路径,配置文件为ini格式
- -s(–ssl): 指定ssl证书路径,证书格式支持p12和pem类型,里面必须包含公钥和私钥,私钥不能有加密密码。如果指定文件夹,会加载文件夹下所有证书。
- -t(–threads): 指定事件驱动线程(干重活)和后台工作线程(干阻塞的活)个数。
./MediaServer -h 查看启动参数
./MediaServer -d & 以守护进程模式启动
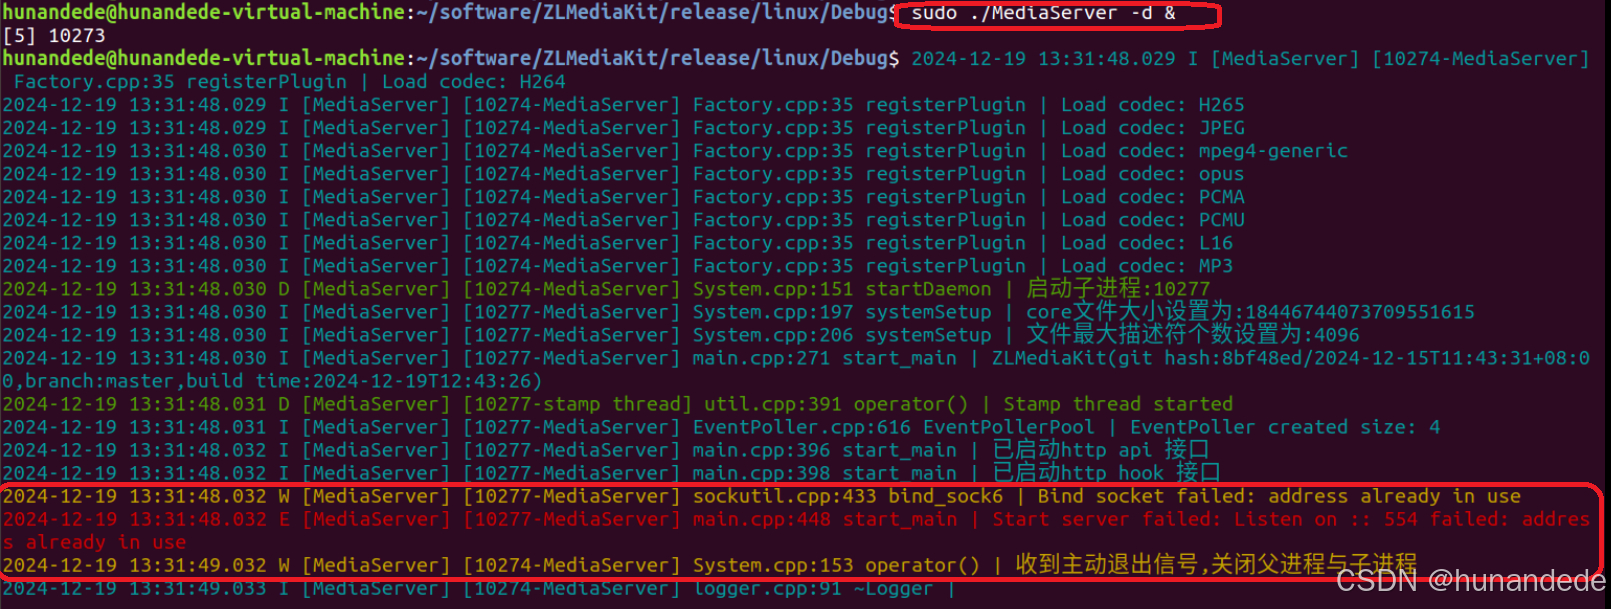
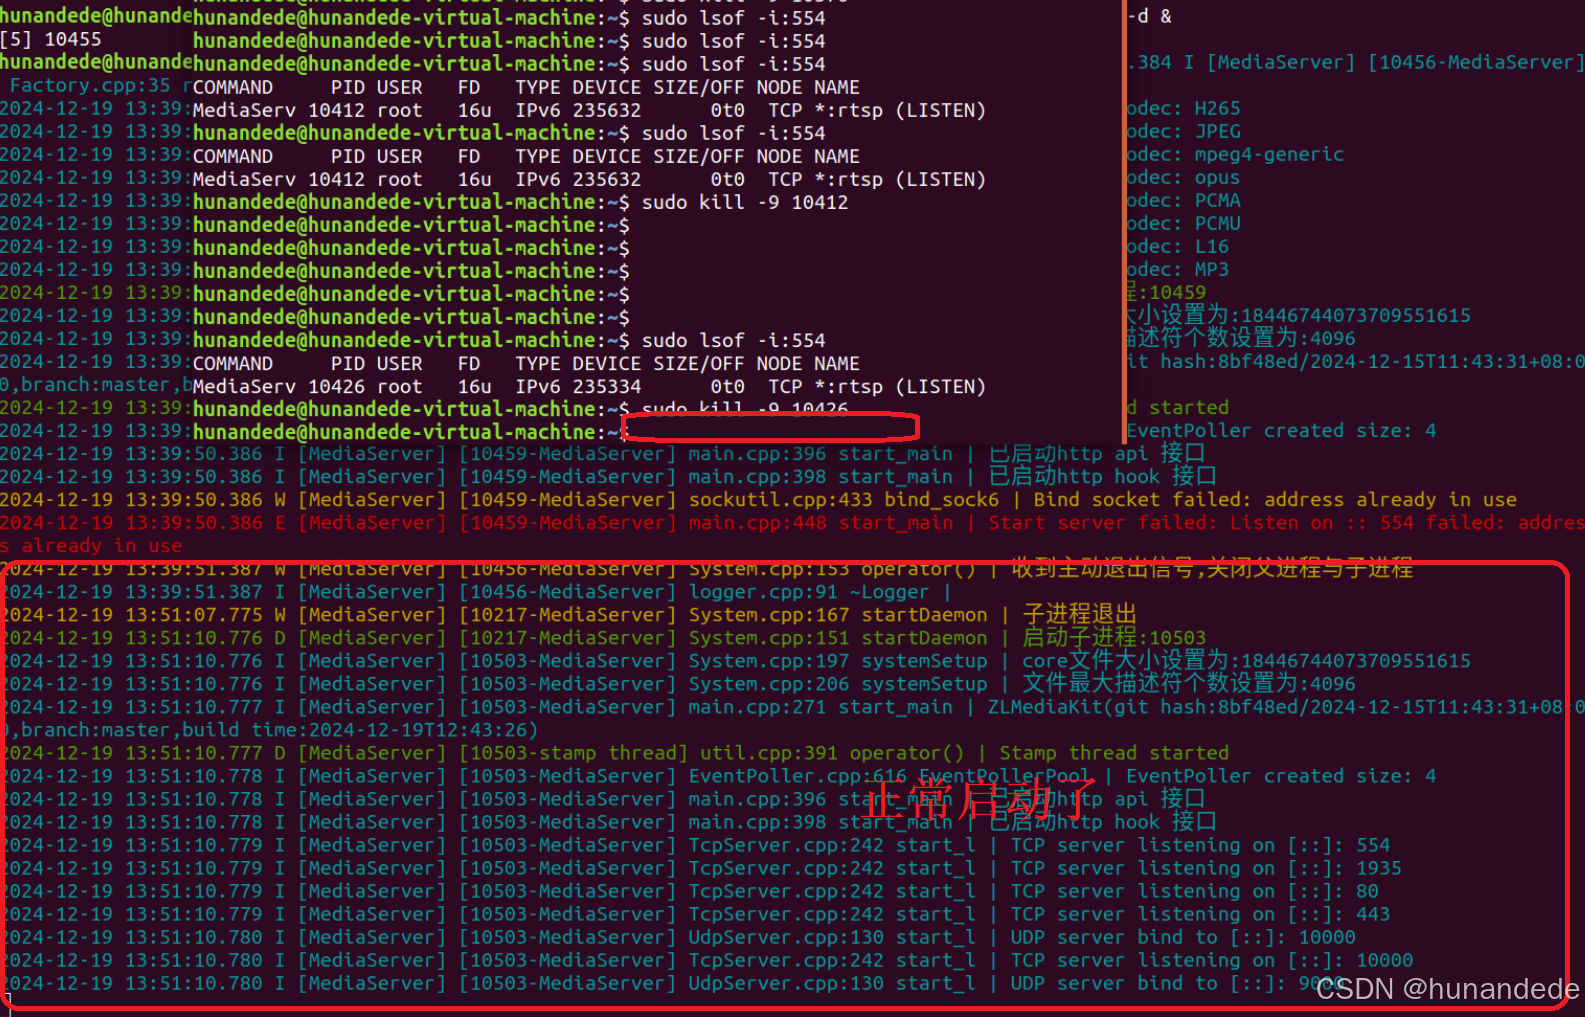
1. 错误排查,原因是 端口号 554 被占用
2. 使用 sudo lsof -i:554 查看554端口被那个 程序占用了

3.使用 sudo kill -9 xxxxx 将 占用该端口的杀死
注意,在杀死占用554 端口的 进程前,./MediaServer -d & 命令行的状态
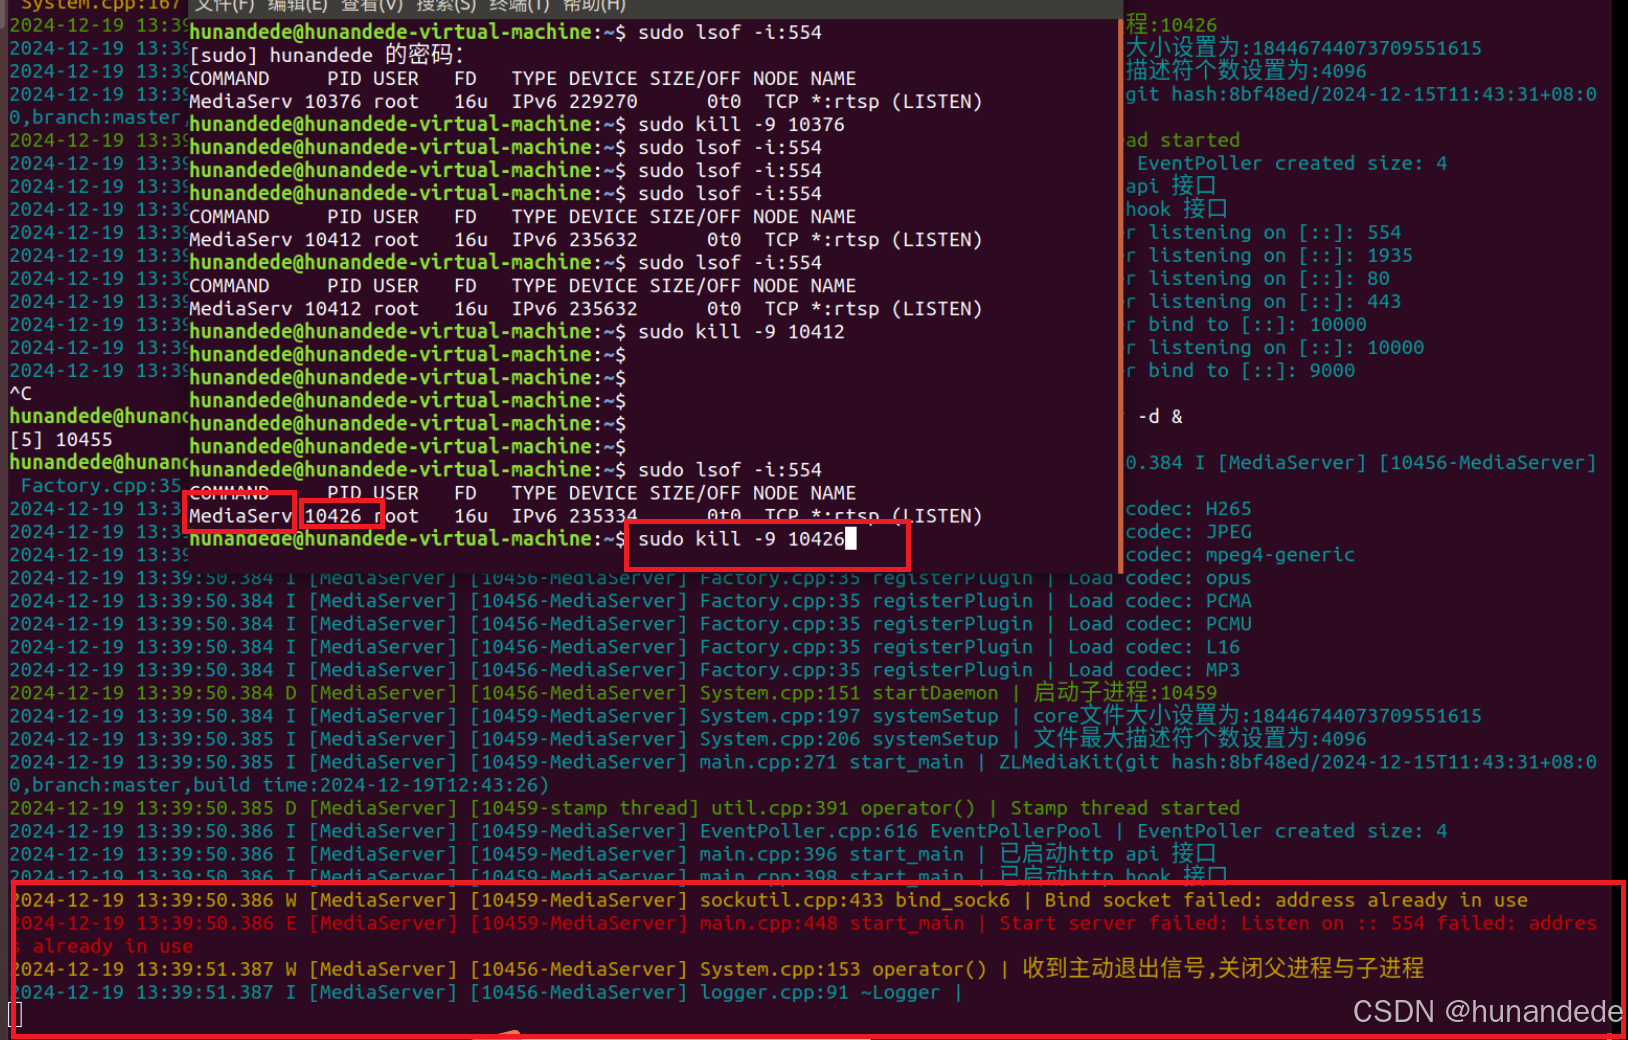
按下回车后的状态,正常启动了。
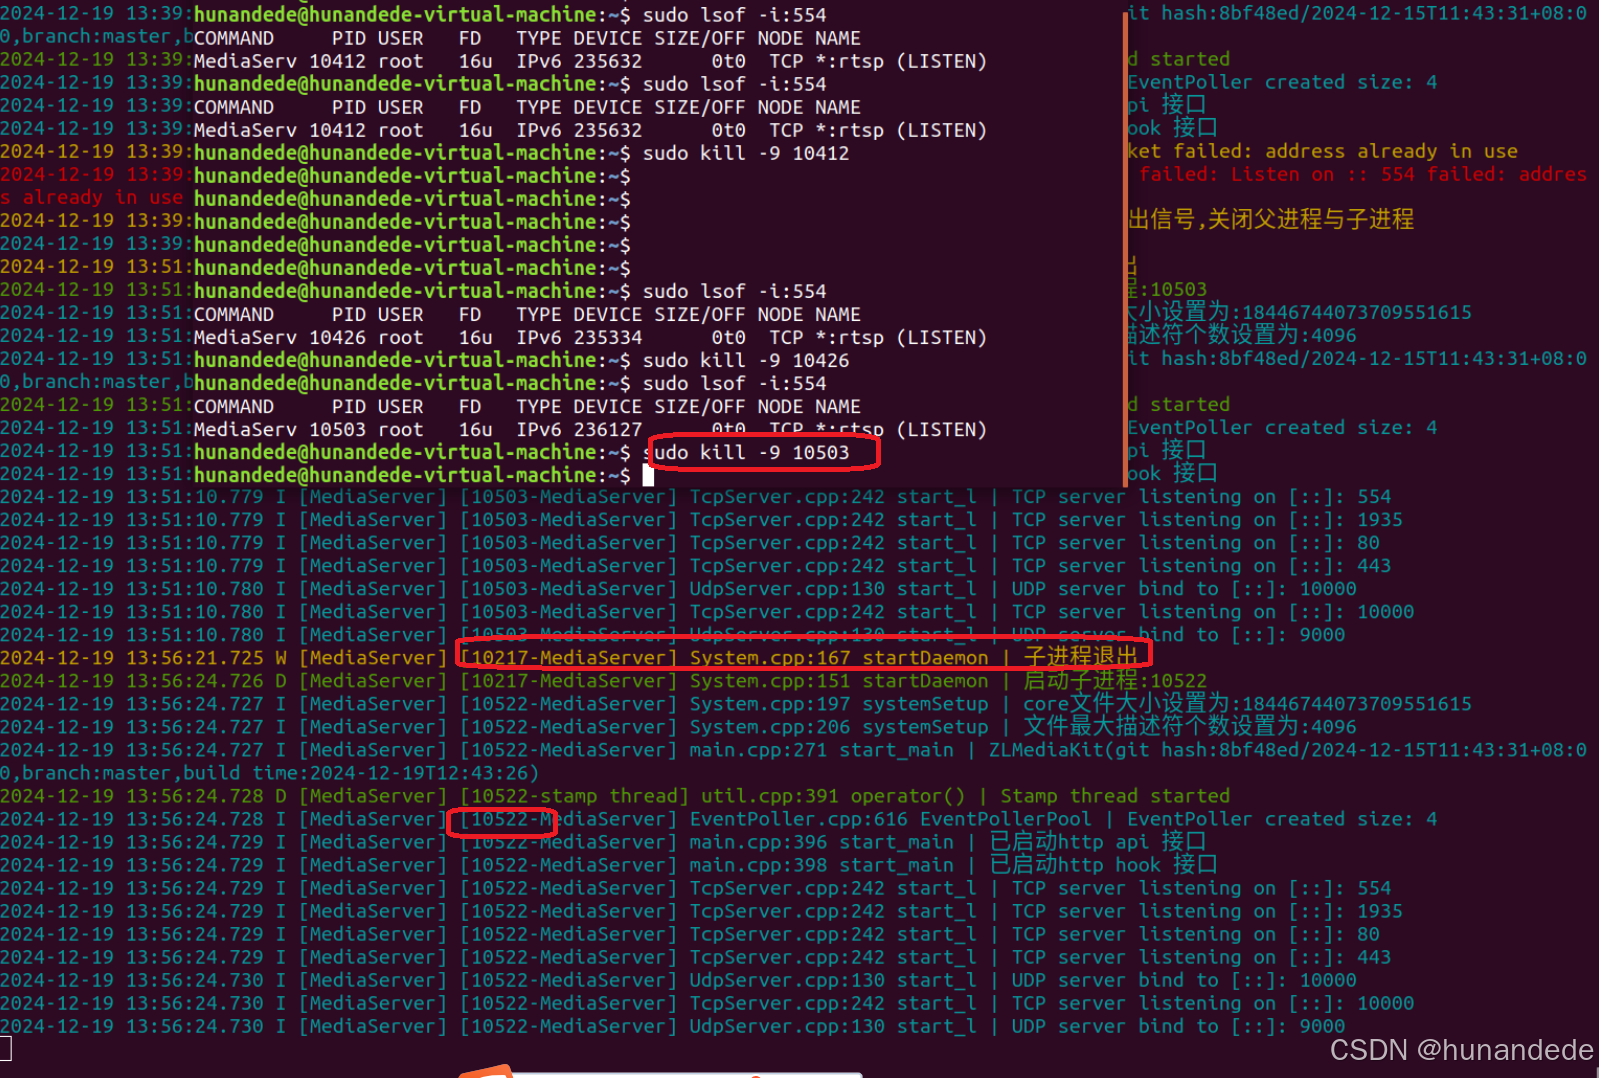
然后我们再将 使用 sudo lsof -i:554 查看554端口被那个 程序占用了,
然后再使用 sudo kill -9 xxx 将 占用该端口的杀死
使用 sudo lsof -i:554 查看554端口 会发现,./MediaServer -d & 的进程号是 10503

然后再使用 sudo kill -9 10503 将 占用该端口的杀死,会发现 ./MediaServer -d & 会重启。
4. debug目录下的config.ini 改动参数
log 很重要,要看log,
有可能其他的端口也会占用了,假设你还安装了 其他的 server,sql server,tomcat等服务器,那么被占用端口是很可能的事情。
如果想改动 ZLMediaKit的端口,请 在config.ini 中改动参数
; auto-generated by mINI class {
[api]
apiDebug=1
defaultSnap=./www/logo.png
downloadRoot=./www
secret=nXIB3CEQY1nAtaoDoe0JSwNCNakR3asa
snapRoot=./www/snap/
[cluster]
origin_url=
retry_count=3
timeout_sec=15
[ffmpeg]
bin=/usr/bin/ffmpeg
cmd=%s -re -i %s -c:a aac -strict -2 -ar 44100 -ab 48k -c:v libx264 -f flv %s
log=./ffmpeg/ffmpeg.log
restart_sec=0
snap=%s -i %s -y -f mjpeg -frames:v 1 -an %s
[general]
broadcast_player_count_changed=0
check_nvidia_dev=1
enableVhost=0
enable_ffmpeg_log=0
flowThreshold=1024
listen_ip=::
maxStreamWaitMS=15000
mediaServerId=your_server_id
mergeWriteMS=0
resetWhenRePlay=1
streamNoneReaderDelayMS=20000
unready_frame_cache=100
wait_add_track_ms=3000
wait_audio_track_data_ms=1000
wait_track_ready_ms=10000
[hls]
broadcastRecordTs=0
deleteDelaySec=10
fastRegister=0
fileBufSize=65536
segDelay=0
segDur=2
segKeep=0
segNum=3
segRetain=5
[hook]
alive_interval=10.0
enable=0
on_flow_report=
on_http_access=
on_play=
on_publish=
on_record_mp4=
on_record_ts=
on_rtp_server_timeout=
on_rtsp_auth=
on_rtsp_realm=
on_send_rtp_stopped=
on_server_exited=
on_server_keepalive=
on_server_started=
on_shell_login=
on_stream_changed=
on_stream_none_reader=
on_stream_not_found=
retry=1
retry_delay=3.0
stream_changed_schemas=rtsp/rtmp/fmp4/ts/hls/hls.fmp4
timeoutSec=10
[http]
allow_cross_domains=1
allow_ip_range=::1,127.0.0.1,172.16.0.0-172.31.255.255,192.168.0.0-192.168.255.255,10.0.0.0-10.255.255.255
charSet=utf-8
dirMenu=1
forbidCacheSuffix=
forwarded_ip_header=
keepAliveSecond=30
maxReqSize=40960
notFound=<html><head><title>404 Not Found</title></head><body bgcolor="white"><center><h1>您访问的资源不存在!</h1></center><hr><center>ZLMediaKit(git hash:8bf48ed/2024-12-15T11:43:31+08:00,branch:master,build time:2024-12-19T12:43:26)</center></body></html>
port=80
rootPath=./www
sendBufSize=65536
sslport=443
virtualPath=
[multicast]
addrMax=239.255.255.255
addrMin=239.0.0.0
udpTTL=64
[protocol]
add_mute_audio=1
auto_close=0
continue_push_ms=15000
enable_audio=1
enable_fmp4=1
enable_hls=1
enable_hls_fmp4=0
enable_mp4=0
enable_rtmp=1
enable_rtsp=1
enable_ts=1
fmp4_demand=0
hls_demand=0
hls_save_path=./www
modify_stamp=2
mp4_as_player=0
mp4_max_second=3600
mp4_save_path=./www
paced_sender_ms=0
rtmp_demand=0
rtsp_demand=0
ts_demand=0
[record]
appName=record
enableFmp4=0
fastStart=0
fileBufSize=65536
fileRepeat=0
sampleMS=500
[rtc]
externIP=
maxRtpCacheMS=5000
maxRtpCacheSize=2048
max_bitrate=0
min_bitrate=0
nackIntervalRatio=1.0
nackMaxCount=15
nackMaxMS=3000
nackMaxSize=2048
nackRtpSize=8
port=8000
preferredCodecA=PCMA,PCMU,opus,mpeg4-generic
preferredCodecV=H264,H265,AV1,VP9,VP8
rembBitRate=0
start_bitrate=0
tcpPort=8000
timeoutSec=15
[rtmp]
directProxy=1
enhanced=0
handshakeSecond=15
keepAliveSecond=15
port=1935
sslport=0
[rtp]
audioMtuSize=600
h264_stap_a=1
lowLatency=0
rtpMaxSize=10
videoMtuSize=1400
[rtp_proxy]
dumpDir=
gop_cache=1
h264_pt=98
h265_pt=99
opus_pt=100
port=10000
port_range=30000-35000
ps_pt=96
rtp_g711_dur_ms=100
timeoutSec=15
udp_recv_socket_buffer=4194304
[rtsp]
authBasic=0
directProxy=1
handshakeSecond=15
keepAliveSecond=15
lowLatency=0
port=554
rtpTransportType=-1
sslport=0
[shell]
maxReqSize=1024
port=0
[srt]
latencyMul=4
pktBufSize=8192
port=9000
timeoutSec=5
; } —
4. ZLMediaKit 已经启动,使用ffmpeg 命令 给该服务器上 推流数据
ZLMediaKit⽀持rtsp/rtmp/rtp推流,
1、使⽤rtsp⽅式推流,我们这一节学这个
1 # h264推流
2 ffmpeg -re -i "/path/to/test.mp4" -vcodec h264 -acodec aac -f rtsp
-rtsp_transport tcp rtsp://127.0.0.1/live/test
3 # h265推流
4 ffmpeg -re -i "/path/to/test.mp4" -vcodec h265 -acodec aac -f rtsp
-rtsp_transport tcp rtsp://127.0.0.1/live/test
ffmpeg -re -i "/path/to/test.mp4" -vcodec h264 -acodec aac -f rtsp -rtsp_transport tcp rtsp://127.0.0.1/live/test
如下的推流说明:
我们将D:/resource/zerenlian.mp4 这个文件推流到 ZLmediakit 服务器;
该文件的 视频格式为 -vcodec h264
该文件的 音频格式为 -acodec aac
推流的方式是rtsp -f rtsp
推流是用tcp 的传送的 -rtsp_transport tcp
服务器的地址写法如下:
rtsp://192.168.31.103/test/00000001zerenlian
rtsp:// 代表的固定格式,如果rtsp 格式 就必须这么写 。
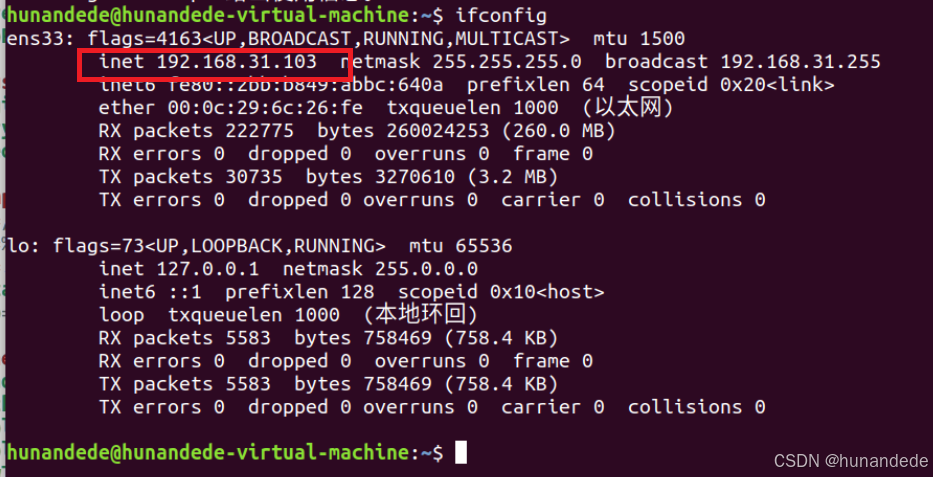
192.168.31.103 是linux服务器的IP。
test/00000001zerenlian 是自己命名的,对于 D:/resource/zerenlian.mp4 文件的映射。
ffmpeg -re -i "D:/resource/zerenlian.mp4" -vcodec h264 -acodec aac -f rtsp -rtsp_transport tcp rtsp://192.168.31.103/test/00000001zerenlian
2.使⽤rtmp⽅式推流
1 #如果未安装FFmpeg,你也可以⽤obs推流
2 ffmpeg -re -i "/path/to/test.mp4" -vcodec h264 -acodec aac -f flv
rtmp://127.0.0.1/live/test
3 # RTMP标准不⽀持H265,但是国内有⾃⾏扩展的,如果你想让FFmpeg⽀持RTMP-H265,请
按照此⽂章编译:https://github.com/ksvc/FFmpeg/wiki/hevcpush
3.使⽤rtp⽅式推流
1 # h264推流
2 ffmpeg -re -i "/path/to/test.mp4" -vcodec h264 -acodec aac -f rtp_mpegts rtp://127.0.0.1:10000
3 # h265推流
4 ffmpeg -re -i "/path/to/test.mp4" -vcodec h265 -acodec aac -f rtp_mpegts rtp://127.0.0.1:10000
1 # h264推流 2 ffmpeg -re -i "/path/to/test.mp4" -vcodec h264 -acodec aac -f rtp_mpegts rtp://127.0.0.1:10000 3 # h265推流 4 ffmpeg -re -i "/path/to/test.mp4" -vcodec h265 -acodec aac -f rtp_mpegts rtp://127.0.0.1:10000
先查看linux的ip,
5. ZLMediaKit 已经启动,使用ffplay 命令从该服务器上 拉流数据
使用 rtsp⽅式拉流
ffplay -rtsp_transport tcp rtsp://192.168.31.103/test/00000001zerenlian
ffplay -rtsp_transport tcp rtsp://192.168.31.103/test/00000001zerenlian
如果我们使用 udp的形式去拉呢?实际测试也是可以的
ffplay -rtsp_transport udp rtsp://192.168.31.103/test/00000001zerenlian
6 log 在这里
/home/hunandede/software/ZLMediaKit/release/linux/Debug/log
7. 在 cmd 上打开 SDP 的log用来观察SDP的 内容
使用推流 和 拉流的 方式打开
ffmpeg -re -i "zerenlian.mp4" -vcodec h264 -acodec aac -f rtsp -rtsp_transport tcp rtsp://192.168.245.130/test/002zerenlianmp4 -loglevel 40

ffplay -rtsp_transport tcp rtsp://192.168.245.130/test/002zerenlianmp4 -loglevel 40


评论前必须登录!
注册