 网硕互联帮助中心
jupyter安装与使用——Ubuntu服务器
- 一、安装miniconda3/anaconda3
-
-
- 1. 下载miniconda3
- 2. 安装miniconda3
- 3. 切换到bin文件夹
- 4. 输入pwd获取路径
- 5. 打开用户环境编辑页面
- 6. 重新加载用户环境变量
- 7. 初始化conda
- 8.验证是否安装成功
- 9.conda配置
-
- 二、安装jupyter
-
-
- 2.1 conda安装
- 2.2 配置Jupyter-config
- 2.3 生成密钥
- 2.4 配置密钥等参数
-
- 三、项目启动
-
-
- 3.1直接启动
- 3.2 后台启动
-
一、安装miniconda3/anaconda3
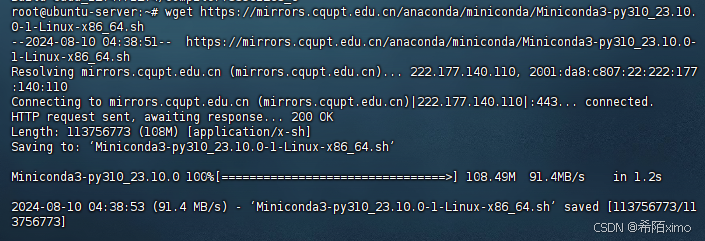
1. 下载miniconda3
wget https://mirrors.cqupt.edu.cn/anaconda/miniconda/Miniconda3-py310_23.10.0-1-Linux-x86_64.sh
2. 安装miniconda3
bash Miniconda3-py310_23.10.0-1-Linux-x86_64.sh -u
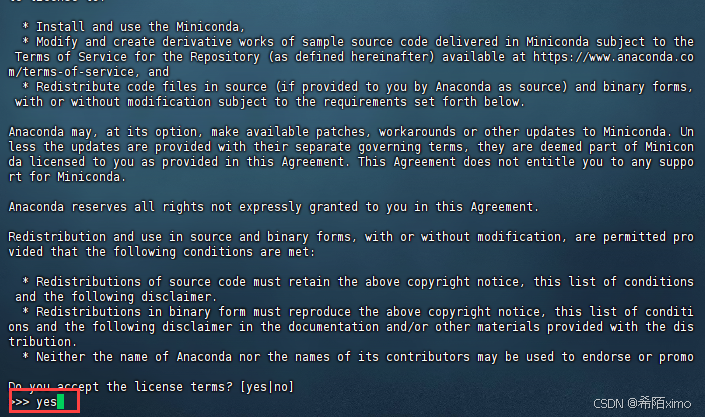
直接一直enter键,到输入路径和yes
这边建议路径为:miniconda3
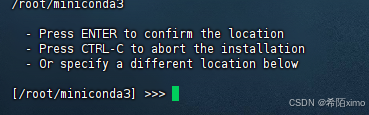
直接回车enter即可,再次输入yes

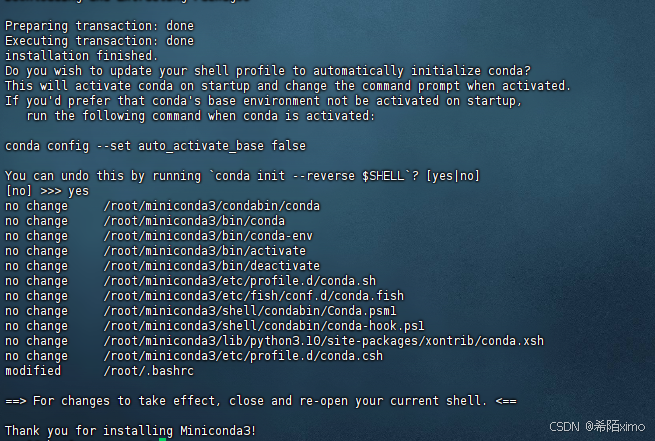
成功安装
3. 切换到bin文件夹
cd miniconda3/bin/
4. 输入pwd获取路径
pwd
复制这里的路径
5. 打开用户环境编辑页面
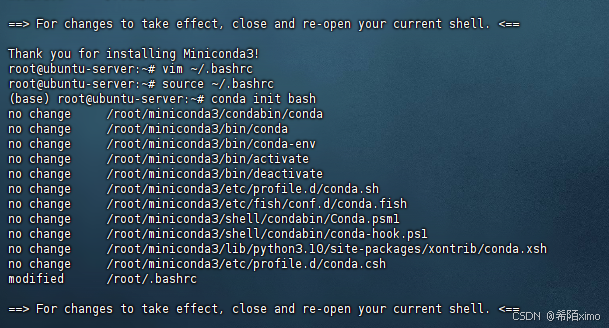
vim ~/.bashrc
- 点击键盘I键进入编辑模式,在最下方输入以下代码
export PATH="/root/miniconda3/bin:$PATH"

按esc键退出编辑模式,输入:wq保存并退出
6. 重新加载用户环境变量
source ~/.bashrc

7. 初始化conda
conda init bash
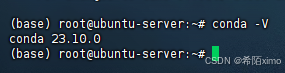
8.验证是否安装成功
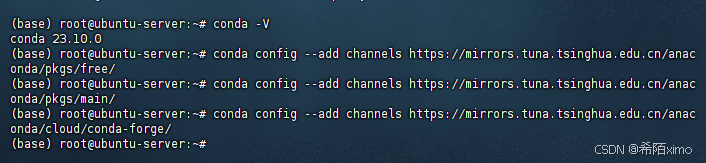
conda -V
9.conda配置
-
1.配置清华镜像源
代码如下:
conda config –add channels https://mirrors.tuna.tsinghua.edu.cn/anaconda/pkgs/free/
conda config –add channels https://mirrors.tuna.tsinghua.edu.cn/anaconda/pkgs/main/
conda config –add channels https://mirrors.tuna.tsinghua.edu.cn/anaconda/cloud/conda-forge/
- 2.设置搜索时显示通道地址
conda config –set show_channel_urls yes

- 3.配置pip 镜像源
pip config set global.index-url https://pypi.tuna.tsinghua.edu.cn/simple

二、安装jupyter
2.1 conda安装
conda install notebook=6.4
2.2 配置Jupyter-config
jupyter notebook –generate-config
2.3 生成密钥
pip install jupyter_server -i https://pypi.tuna.tsinghua.edu.cn/simple
python
from jupyter_server.auth import passwd;
passwd()
2.4 配置密钥等参数
/root/.jupyter/jupyter_notebook_config.py
c.NotebookApp.ip = '0.0.0.0' # 设置访问IP
c.NotebookApp.password = '' # 输入刚刚生成的密钥
c.NotebookApp.open_browser = False # 默认不自动打开浏览器
c.NotebookApp.port = 8888 # 设置端口, 其他端口也是可以的
c.NotebookApp.notebook_dir = '/root/project' # 设置Jupyternotebook 打开的根目录
c.NotebookApp.allow_remote_access = True #是否允许远程访问
三、项目启动
项目启动有两种方式:
3.1直接启动
终端输入命令:
jupyter-notebook –allow-root
- 该方式的好处是可以在终端实时查看jupyter界面操作,即日子实时打印的功能。缺点是终端退出,服务就终止了。
3.2 后台启动
终端输入命令:
nohup jupyter notebook –allow-root &


评论前必须登录!
注册