 网硕互联帮助中心
前言
fly-iot飞凡物联专栏: https://blog.csdn.net/freewebsys/category_12219758.html
视频展示
【fly-iot】(8):使用阿里云申请域名,绑定服务器,icp备案,使用vue-press构建网站内容,安装openresty服务器配置路径,配置ssl证书
1,申请域名,iot项目域名 fly-iot.com
项目代码。 https://gitee.com/fly-iot/fly-iot-platform
找一个自己喜欢的域名申请,然后进行ICP备案。 就是按照操作一步一步就行,会有人打电话通知情况。 https://wanwang.aliyun.com/domain/
否则会展示成这样: 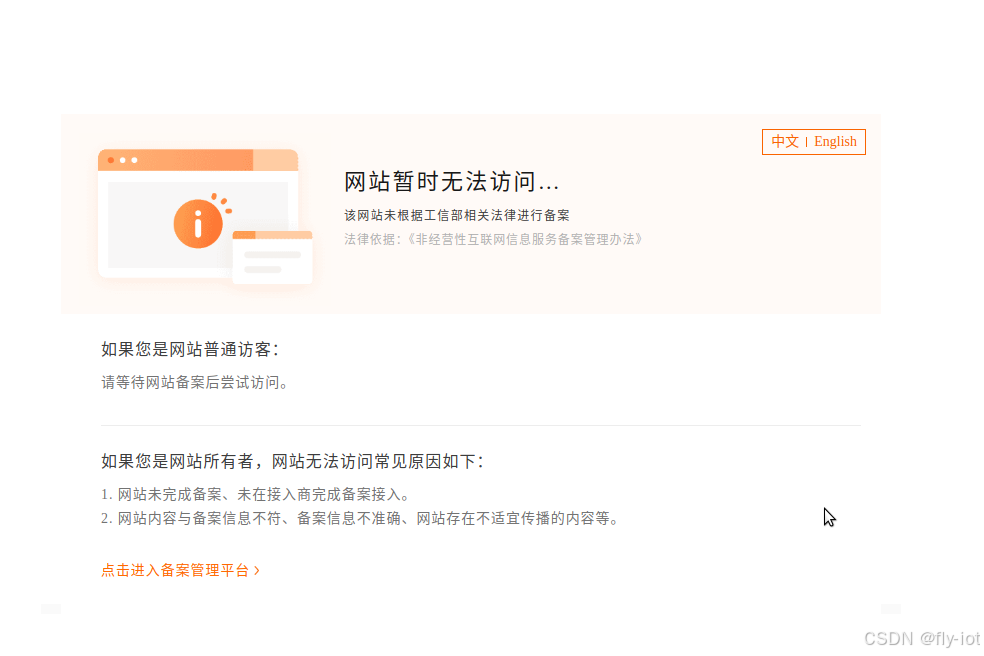
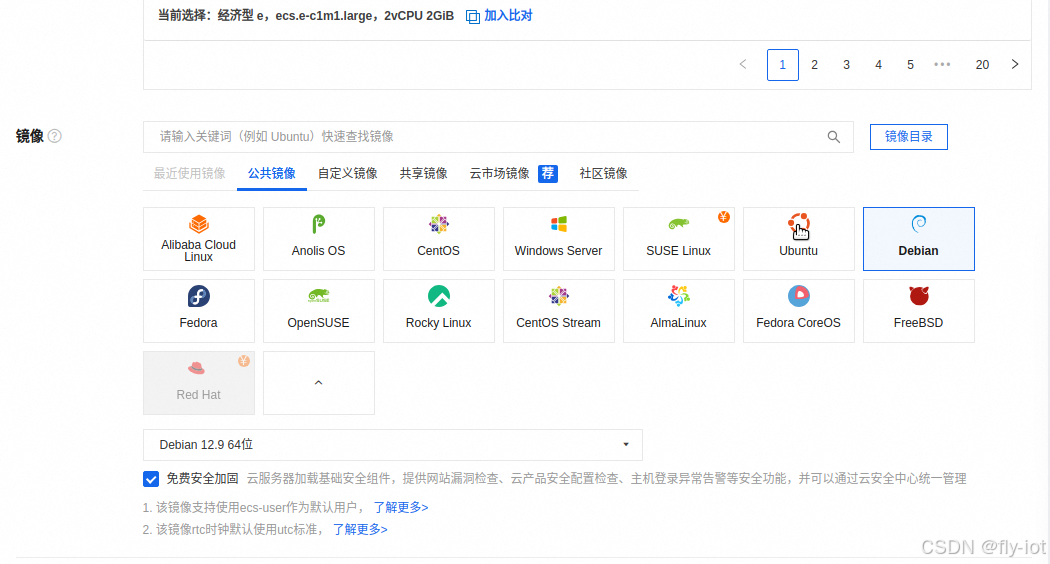
2,申请服务器,新手99一年的ECS,以后可以动态流量
有便宜的服务器可以申请。 https://www.aliyun.com/product/ecs
申请域名备案的时候会需要服务器。
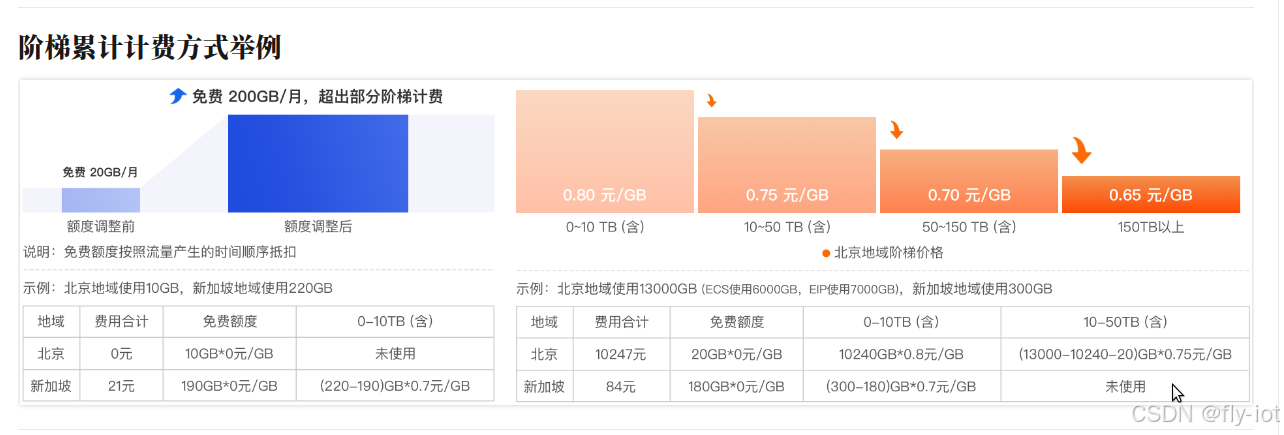
可以申请动态流量,网络成本占比一半以上。 https://help.aliyun.com/zh/cdt/product-overview/internet-data-transfers
3,在服务器上按照openresty服务
也可以直接安装nginx,但是这个可以使用lua脚本,进行拦截开发程序。 非常的方便。所以使用这个。
https://openresty.org/cn/linux-packages.html
这边使用的是x86 debian 12 的安装方案:
# 步骤一:安装导入 GPG 公钥时所需的几个依赖包(整个安装过程完成后可以随时删除它们):
sudo apt-get -y install –no-install-recommends wget gnupg ca-certificates
# 步骤二:导入openresty 的 GPG 密钥:
debian >= 12 的版本
wget -O – https://openresty.org/package/pubkey.gpg | sudo gpg –dearmor -o /etc/apt/trusted.gpg.d/openresty.gpg
# 步骤三:添加我们官方 APT 仓库。
# 对于 x86_64 或 amd64 系统,可以使用下面的命令:
codename=`grep -Po 'VERSION="[0-9]+ \\(\\K[^)]+' /etc/os-release`
echo "deb http://openresty.org/package/debian $codename openresty" \\
| sudo tee /etc/apt/sources.list.d/openresty.list
# 步骤四:更新 APT 索引 安装
sudo apt-get update
# 不安装推荐包
sudo apt-get -y install –no-install-recommends openresty
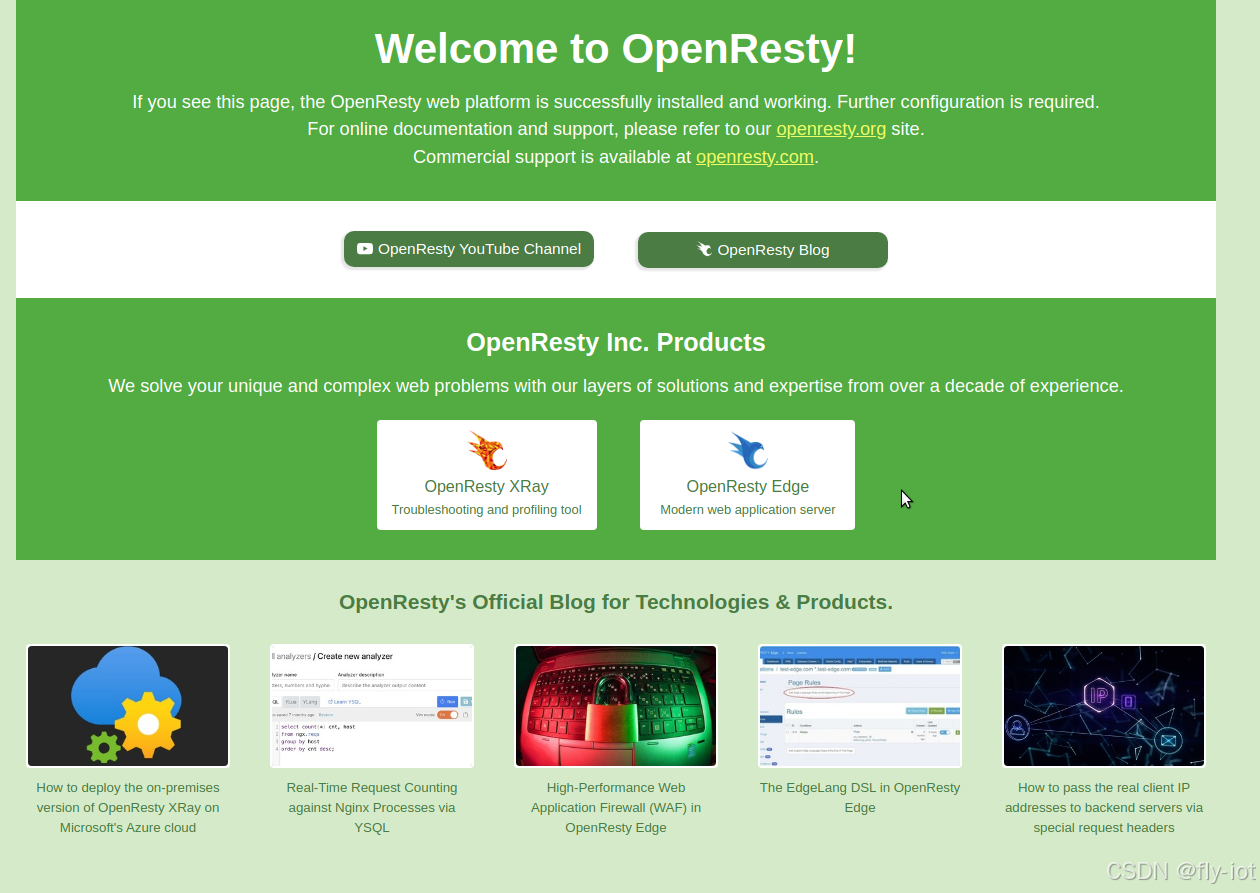
# 服务启动:
systemctl restart openresty
安装结果:
Preparing to unpack .../openresty-zlib_1.3.1-1~bookworm1_amd64.deb ...
Unpacking openresty-zlib (1.3.1-1~bookworm1) ...
Selecting previously unselected package openresty-openssl3.
Preparing to unpack .../openresty-openssl3_3.0.15-1~bookworm1_amd64.deb ...
Unpacking openresty-openssl3 (3.0.15-1~bookworm1) ...
Selecting previously unselected package openresty-pcre2.
Preparing to unpack .../openresty-pcre2_10.44-1~bookworm1_amd64.deb ...
Unpacking openresty-pcre2 (10.44-1~bookworm1) ...
Selecting previously unselected package openresty.
Preparing to unpack .../openresty_1.27.1.1-1~bookworm1_amd64.deb ...
Unpacking openresty (1.27.1.1-1~bookworm1) ...
Setting up openresty-zlib (1.3.1-1~bookworm1) ...
Setting up openresty-pcre2 (10.44-1~bookworm1) ...
Setting up openresty-openssl3 (3.0.15-1~bookworm1) ...
Setting up openresty (1.27.1.1-1~bookworm1) ...
Created symlink /etc/systemd/system/multi-user.target.wants/openresty.service → /lib/systemd/system/openresty.service.
Processing triggers for libc-bin (2.36-9+deb12u9) ...
启动成功页面:
4,然后使用项目 vue-press 构建页面
使用 markdown 进行页面编辑,然后做展示。
参数对比:
https://gitee.com/vuejs/vuepress/tree/master/packages/docs
https://vuepress.vuejs.org/zh/guide/page.html
安装nodejs版本
https://nodejs.org/en/download
下载地址: https://nodejs.org/dist/v22.13.1/node-v22.13.1-linux-x64.tar.xz
解压缩到:
/usr/lib64/node
设置环境变量:~/.bashrc
# set node path:
export NODE_HOME=/usr/lib64/node
export PATH=$PATH:$NODE_HOME/bin
export NODE_PATH=$NODE_HOME/lib/node_modules
# 执行安装node 库
npm run build
5,修改openresty 配置文件
/usr/local/openresty/nginx/conf
server {
listen 80;
gzip on;
server_name localhost;
root /data/www/iot-doc;
location / {
index index.html index.htm;
}
error_page 404 /404.html;
error_page 500 502 503 504 /50x.html;
location = /50x.html {
root html;
}
location = /404.html {
root html;
}
}
6,然后就可以展示了
直接把项目文件的 dist 文件拷贝过去就可以了。 
7,配置ssl证书,dev证书比较便宜
可以一次买断,从阿里云上: https://www.aliyun.com/product/cas
 当然也有免费的证书领取3个月的:
https://console.cloud.tencent.com/ssl/dsc/apply 
8,openresty 源码安装,带ssl模块
https://openresty.org/cn/download.html
(1)PCRE库 PCRE库支持正则表达式。如果我们在配置文件nginx.conf中使用了正则表达式,那么在编译Nginx时就必须把PCRE库编译进Nginx,因为Nginx的HTTP模块需要靠它来解析正则表达式。另外,pcre-devel是使用PCRE做二次开发时所需要的开发库,包括头文件等,这也是编译Nginx所必须使用的。 (2)zlib库 zlib库用于对HTTP包的内容做gzip格式的压缩,如果我们在nginx.conf中配置了gzip on,并指定对于某些类型(content-type)的HTTP响应使用gzip来进行压缩以减少网络传输量,则在编译时就必须把zlib编译进Nginx。zlib-devel是二次开发所需要的库。 (3)OpenSSL库 如果服务器不只是要支持HTTP,还需要在更安全的SSL协议上传输HTTP,那么需要拥有OpenSSL。另外,如果我们想使用MD5、SHA1等散列函数,那么也需要安装它。
apt-get install -y libssl-dev libpcre3 libpcre3-dev zlib1g-dev
wget https://openresty.org/download/openresty-1.27.1.1.tar.gz
tar -zxvf openresty-1.27.1.1.tar.gz
cd openresty-1.27.1.1/
./configure
gmake && gmake install
Configuration summary
+ using system PCRE library
+ using system OpenSSL library
+ using system zlib library
cp conf/nginx.conf '/usr/local/openresty/nginx/conf/nginx.conf.default'
test -d '/usr/local/openresty/nginx/logs' \\
|| mkdir -p '/usr/local/openresty/nginx/logs'
test -d '/usr/local/openresty/nginx/logs' \\
|| mkdir -p '/usr/local/openresty/nginx/logs'
test -d '/usr/local/openresty/nginx/html' \\
|| cp -R docs/html '/usr/local/openresty/nginx'
test -d '/usr/local/openresty/nginx/logs' \\
|| mkdir -p '/usr/local/openresty/nginx/logs'
gmake[2]: Leaving directory '/data/openresty-1.27.1.1/build/nginx-1.27.1'
gmake[1]: Leaving directory '/data/openresty-1.27.1.1/build/nginx-1.27.1'
mkdir -p /usr/local/openresty/site/lualib /usr/local/openresty/site/pod /usr/local/openresty/site/manifest
ln -sf /usr/local/openresty/nginx/sbin/nginx /usr/local/openresty/bin/openresty
nginx 配置 ssl 需要重新编译: https://blog.csdn.net/qq_41765664/article/details/144418284


评论前必须登录!
注册