 网硕互联帮助中心
启用 Basic 认证(基本身份验证)通常涉及配置 Web 服务器或应用程序,让其在每次访问需要保护的资源时要求用户提供用户名和密码。下面是如何在不同的服务器环境中启用 Basic 认证的操作步骤。
1. 在 Apache 中启用 Basic 认证
Apache 是最常用的 Web 服务器之一,下面是配置 Basic 认证 的步骤:
1.1 创建密码文件
首先,你需要一个密码文件,这个文件会保存用户的用户名和密码。可以使用 htpasswd 工具来生成该文件。
-
在终端中运行以下命令生成密码文件:
htpasswd -c /path/to/.htpasswd username
这将创建一个 .htpasswd 文件并提示你输入密码。如果文件已经存在(即首次未创建),不要使用 -c 选项,而是直接使用:
htpasswd /path/to/.htpasswd username
username 是你想为其设置密码的用户名。
1.2 配置 Apache 启用 Basic 认证
然后,你需要在 Apache 的配置文件(如 .htaccess 或 httpd.conf)中启用 Basic 认证。
在你的目标目录中,创建 .htaccess 文件(如果尚未创建),并添加以下内容:
AuthType Basic AuthName "Restricted Area" AuthUserFile /path/to/.htpasswd Require valid-user
- AuthType Basic:指定认证类型为 Basic 认证。
- AuthName "Restricted Area":设置弹出认证对话框的提示信息。
- AuthUserFile /path/to/.htpasswd:指定包含用户名和密码的文件路径。
- Require valid-user:表示任何有效的用户名和密码组合都可以访问该资源。
1.3 重新加载 Apache 配置
保存 .htaccess 文件后,重新加载 Apache 配置,使更改生效:
sudo systemctl reload apache2
2. 在 Nginx 中启用 Basic 认证
Nginx 也可以配置 Basic 认证,但其设置稍有不同。
2.1 创建密码文件
首先,使用 htpasswd 命令创建密码文件(同 Apache 中一样)。如果你的系统没有安装 htpasswd 工具,可能需要安装 apache2-utils 包。
sudo apt-get install apache2-utils
htpasswd -c /etc/nginx/.htpasswd username
2.2 配置 Nginx 启用 Basic 认证
接下来,编辑 Nginx 配置文件(例如 /etc/nginx/sites-available/default 或其他你特定站点的配置文件)。
在你希望启用认证的 server 或 location 块中添加以下内容:
location /protected/ {
auth_basic "Restricted Area";
auth_basic_user_file /etc/nginx/.htpasswd;
}
- auth_basic "Restricted Area":设置弹出认证对话框的提示信息。
- auth_basic_user_file /etc/nginx/.htpasswd:指定包含用户名和密码的文件路径。
2.3 重新加载 Nginx 配置
修改完配置后,重新加载 Nginx 配置:
sudo systemctl reload nginx
3. 在 Node.js 中启用 Basic 认证
如果你使用 Node.js 开发应用,且希望在某些路由中启用 Basic 认证,可以使用中间件来处理认证。
安装 express 和 basic-auth 模块:
npm install express basic-auth
在你的 Node.js 应用中添加 Basic 认证中间件:
const express = require('express');
const basicAuth = require('basic-auth');
const app = express();
// Basic Authentication 中间件
app.use((req, res, next) => {
const user = basicAuth(req);
if (!user || user.name !== 'username' || user.pass !== 'password') {
res.setHeader('WWW-Authenticate', 'Basic realm="Restricted"');
return res.status(401).send('Authentication required');
}
next();
});
// 保护的路由
app.get('/protected', (req, res) => {
res.send('This is a protected area.');
});
// 启动服务器
app.listen(3000, () => {
console.log('Server running on port 3000');
});
在上面的代码中,username 和 password 是你设置的用户名和密码。你可以根据需要更改它们。
4. 在 .NET Core 中启用 Basic 认证
在 .NET Core 中,可以通过中间件实现 Basic 认证。
4.1 创建 Basic 认证中间件
首先,创建一个自定义的 Basic 认证中间件:
public class BasicAuthenticationMiddleware
{
private readonly RequestDelegate _next;
public BasicAuthenticationMiddleware(RequestDelegate next)
{
_next = next;
}
public async Task InvokeAsync(HttpContext httpContext)
{
var header = httpContext.Request.Headers["Authorization"].ToString();
if (header != null && header.StartsWith("Basic "))
{
var encodedCredentials = header.Substring(6);
var decodedCredentials = Encoding.UTF8.GetString(Convert.FromBase64String(encodedCredentials));
var credentials = decodedCredentials.Split(':');
var username = credentials[0];
var password = credentials[1];
if (username == "user" && password == "password") // 用你自己的用户名和密码
{
await _next(httpContext);
return;
}
}
httpContext.Response.Headers["WWW-Authenticate"] = "Basic realm=\\"MyApp\\"";
httpContext.Response.StatusCode = 401;
}
}
4.2 在 Startup.cs 配置中间件
在 Configure 方法中使用自定义的 Basic 认证中间件:
public void Configure(IApplicationBuilder app, IWebHostEnvironment env)
{
app.UseMiddleware<BasicAuthenticationMiddleware>();
app.UseRouting();
app.UseEndpoints(endpoints =>
{
endpoints.MapControllers();
});
}
5. 测试 Basic 认证
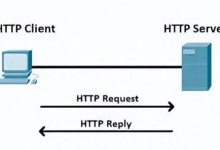
配置完成后,你可以通过浏览器或 HTTP 客户端(如 Postman 或 curl)来测试 Basic 认证。
- 在浏览器中访问受保护的 URL,会弹出用户名和密码的输入框。
- 在 curl 中使用以下命令进行测试:
curl -u username:password http://example.com/protected
- 如果用户名和密码正确,应该能够访问资源;如果不正确,将会收到 401 Unauthorized 响应。
总结
- Apache 和 Nginx 的配置相对简单,主要是在配置文件中设置认证类型和密码文件路径。
- Node.js 和 .NET Core 需要通过代码实现 Basic 认证。
通过这些步骤,你可以在不同的服务器和应用环境中启用 Basic 认证。

![[特殊字符] 超轻高性能的 Rust HTTP 服务器 —— Hyperlane [特殊字符][特殊字符]-网硕互联帮助中心](https://www.wsisp.com/helps/wp-content/uploads/2025/04/20250419074625-680354d12aeea-220x150.png)


评论前必须登录!
注册