 网硕互联帮助中心
openvpn2.0.9搭建和windows客户端拨号连接vpn,并用xshell连接机房只有内网的服务器
如果对运维课程感兴趣,可以在b站上、csdn或微信视频号 上搜索我的账号: 运维实战课程,可以关注我,学习更多免费的运维实战技术视频
1.openvpnserver服务器的安装、配置和服务启动:
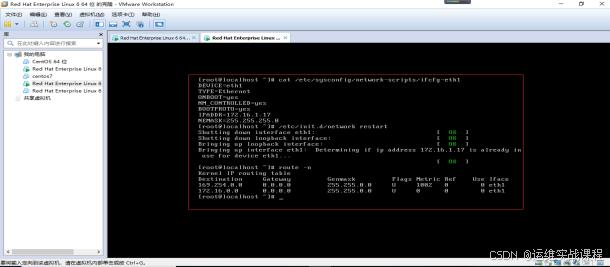
vpnserver服务器:(双网卡eth0(外网)和eth1(内网))
[root@localhost ~]# ifconfig eth0 |head -3 外网(nat模式)
eth0 Link encap:Ethernet HWaddr 00:0C:29:E1:54:C6
inet addr:192.168.43.128 Bcast:192.168.43.255 Mask:255.255.255.0
inet6 addr: fe80::20c:29ff:fee1:54c6/64 Scope:Link
[root@localhost ~]# ifconfig eth1 |head -3 内网(vmnet2)
eth1 Link encap:Ethernet HWaddr 00:0C:29:E1:54:D0
inet addr:172.16.1.28 Bcast:172.16.1.255 Mask:255.255.255.0
inet6 addr: fe80::20c:29ff:fee1:54d0/64 Scope:Link
[root@localhost ~]# route -n
Kernel IP routing table
Destination Gateway Genmask Flags Metric Ref Use Iface
172.16.1.0 0.0.0.0 255.255.255.0 U 0 0 0 eth1
192.168.43.0 0.0.0.0 255.255.255.0 U 0 0 0 eth0
169.254.0.0 0.0.0.0 255.255.0.0 U 1002 0 0 eth0
169.254.0.0 0.0.0.0 255.255.0.0 U 1003 0 0 eth1
0.0.0.0 192.168.43.2 0.0.0.0 UG 0 0 0 eth0
正常eth0外网卡:要配置网关,dns等。
内网卡eth1:不配网关。 双网卡时候,网关只配置一个即可。
[root@localhost ~]# ping 172.16.1.17
PING 172.16.1.17 (172.16.1.17) 56(84) bytes of data.
64 bytes from 172.16.1.17: icmp_seq=1 ttl=64 time=1.90 ms
[root@localhost ~]# cat /etc/redhat-release
CentOS release 6.5 (Final)
1)配置vpn服务器时间同步,如果不配,vpn可能不成功。
[root@localhost ~]# /usr/sbin/ntpdate pool.ntp.org
2 Jun 14:00:50 ntpdate[1729]: step time server 85.199.214.100 offset 1404709.077974 sec
[root@localhost ~]# echo '*/5 * * * * /usr/sbin/ntpdate pool.ntp.org >/dev/null 2>&1' >> /var/spool/cron/root
[root@localhost ~]# crontab -l
*/5 * * * * /usr/sbin/ntpdate pool.ntp.org >/dev/null 2>&1
[root@localhost ~]# mkdir /data/application/openvpn -p
[root@localhost ~]# cd /data/application/openvpn/
[root@localhost openvpn]# rz
上传压缩模块和openvpn软件
[root@localhost openvpn]# ls
lzo-2.03.tar.gz openvpn-2.0.9.tar.gz
2)安装openvpn之前,先安装lzo压缩模块:
[root@localhost openvpn]# yum -y install gcc gcc-c++
[root@localhost openvpn]# tar -zxf lzo-2.03.tar.gz
[root@localhost openvpn]# ls
lzo-2.03 lzo-2.03.tar.gz openvpn-2.0.9.tar.gz
[root@localhost openvpn]# cd lzo-2.03
[root@localhost lzo-2.03]# ls
aclocal.m4 AUTHORS B ChangeLog configure COPYING examples INSTALL Makefile.am minilzo README tests util
asm autoconf BUGS config.hin configure.ac doc include lzotest Makefile.in NEWS src THANKS
[root@localhost lzo-2.03]# ./configure
[root@localhost lzo-2.03]# make
[root@localhost lzo-2.03]# make install
[root@localhost lzo-2.03]# cd ..
[root@localhost openvpn]# ls
lzo-2.03 lzo-2.03.tar.gz openvpn-2.0.9.tar.gz
3)安装openvpn依赖包openssl* pam-devel
[root@localhost openvpn]# yum -y install openssl* 否则报错:configure: error: OpenSSL Crypto headers not found
[root@localhost openvpn]# rpm -qa openssl*
openssl-static-1.0.1e-57.el6.x86_64
openssl098e-0.9.8e-20.el6.centos.1.x86_64
openssl-1.0.1e-57.el6.x86_64
openssl-devel-1.0.1e-57.el6.x86_64
openssl-perl-1.0.1e-57.el6.x86_64
[root@localhost openvpn]# yum -y install pam-devel 否则报错:configure: error: libpam required but missing
4)安装openvpn:
[root@localhost openvpn]# ls
lzo-2.03 lzo-2.03.tar.gz openvpn-2.0.9.tar.gz
[root@localhost openvpn]# tar -zxf openvpn-2.0.9.tar.gz
[root@localhost openvpn]# ls
lzo-2.03 lzo-2.03.tar.gz openvpn-2.0.9 openvpn-2.0.9.tar.gz
[root@localhost openvpn]# cd openvpn-2.0.9
[root@localhost openvpn-2.0.9]# ls
acinclude.m4 COPYRIGHT.GPL fragment.h Makefile.in mtu.h otime.h README socks.h
aclocal.m4 cryptoapi.c gentoo makefile.w32 mudp.c packet_id.c reliable.c ssl.c
AUTHORS cryptoapi.h gremlin.c makefile.w32-vc mudp.h packet_id.h reliable.h ssl.h
base64.c crypto.c gremlin.h manage.c multi.c perf.c route.c status.c
base64.h crypto.h helper.c manage.h multi.h perf.h route.h status.h
basic.h debug helper.h management NEWS ping.c sample-config-files suse
buffer.c depcomp init.c mbuf.c ntlm.c ping.h sample-keys syshead.h
buffer.h doclean init.h mbuf.h ntlm.h ping-inline.h sample-scripts tap-win32
ChangeLog easy-rsa INSTALL memcmp.c occ.c plugin schedule.c t_cltsrv.sh
circ_list.h errlevel.h install-sh memdbg.h occ.h plugin.c schedule.h thread.c
common.h error.c install-win32 misc.c occ-inline.h plugin.h service-win32 thread.h
config.guess error.h INSTALL-win32.txt misc.h openvpn.8 pool.c session_id.c t_lpback.sh
config.h.in event.c integer.h missing openvpn.c pool.h session_id.h tun.c
config.sub event.h interval.c mroute.c openvpn.h PORTS shaper.c tun.h
configure fdmisc.c interval.h mroute.h openvpn-plugin.h proto.c shaper.h win32.c
configure.ac fdmisc.h list.c mss.c openvpn.spec proto.h sig.c win32.h
config-win32.h forward.c list.h mss.h openvpn.spec.in proxy.c sig.h
config-win32.h.in forward.h lzo.c mtcp.c options.c proxy.h socket.c
contrib forward-inline.h lzo.h mtcp.h options.h push.c socket.h
COPYING fragment.c Makefile.am mtu.c otime.c push.h socks.c
[root@localhost openvpn-2.0.9]# ./configure –with-lzo-headers=/usr/local/include/ –with-lzo-lib=/usr/local/lib
#注意:配置时候需加上压缩包的路径:lzo压缩包,默认编译时候就到了/usr/local下面了。
[root@localhost openvpn-2.0.9]# make
[root@localhost openvpn-2.0.9]# make install
[root@localhost openvpn-2.0.9]# cd
[root@localhost ~]# which openvpn
/usr/local/sbin/openvpn
[root@localhost ~]# ls /usr/local/sbin/openvpn
/usr/local/sbin/openvpn #执行的脚本命令
5)openvpn server服务上建立CA证书:
进入软件安装目录下面的:/data/application/openvpn/openvpn-2.0.9/easy-rsa/2.0/
[root@localhost ~]# cd /data/application/openvpn/openvpn-2.0.9/easy-rsa/2.0/
[root@localhost 2.0]# ls
build-ca build-key build-key-server clean-all Makefile pkitool sign-req
build-dh build-key-pass build-req inherit-inter openssl-0.9.6.cnf README vars
build-inter build-key-pkcs12 build-req-pass list-crl openssl.cnf revoke-full whichopensslcnf
[root@localhost 2.0]# cp vars vars.bak
[root@localhost 2.0]# vim vars
…….#最下面5行修改成如下:
export KEY_COUNTRY="CN"
export KEY_PROVINCE="BJ"
export KEY_CITY="Beijing"
export KEY_ORG="oldboy"
export KEY_EMAIL="1441107787@qq.com"
export KEY_OU="oldboy"
[root@localhost 2.0]# tail –6 vars
export KEY_COUNTRY="CN"
export KEY_PROVINCE="BJ"
export KEY_CITY="Beijing"
export KEY_ORG="oldboy"
export KEY_EMAIL="1441107787@qq.com"
export KEY_OU="oldboy"
[root@localhost 2.0]# source vars #刷新,使得配置生效
NOTE: If you run ./clean-all, I will be doing a rm -rf on /data/application/openvpn/openvpn-2.0.9/easy-rsa/2.0/keys
[root@localhost 2.0]# pwd
/data/application/openvpn/openvpn-2.0.9/easy-rsa/2.0
[root@localhost 2.0]# ls #目前还没有keys目录
build-ca build-key build-key-server clean-all Makefile pkitool sign-req whichopensslcnf
build-dh build-key-pass build-req inherit-inter openssl-0.9.6.cnf README vars
build-inter build-key-pkcs12 build-req-pass list-crl openssl.cnf revoke-full vars.bak
[root@localhost 2.0]# ./clean-all #清空所有的秘钥和证书,重新来,因为是新的环境可以这么操作
[root@localhost 2.0]# ls
build-ca build-key build-key-server clean-all list-crl openssl.cnf revoke-full vars.bak
build-dh build-key-pass build-req inherit-inter Makefile pkitool sign-req whichopensslcnf
build-inter build-key-pkcs12 build-req-pass keys openssl-0.9.6.cnf README vars
[root@localhost 2.0]# ls keys/
index.txt serial
[root@localhost 2.0]# ./build-ca
Generating a 1024 bit RSA private key
………………………………….++++++
………………………………………++++++
writing new private key to 'ca.key'
—–
You are about to be asked to enter information that will be incorporated
into your certificate request.
What you are about to enter is what is called a Distinguished Name or a DN.
There are quite a few fields but you can leave some blank
For some fields there will be a default value,
If you enter '.', the field will be left blank.
—–
Country Name (2 letter code) [CN]:
State or Province Name (full name) [BJ]:
Locality Name (eg, city) [Beijing]:
Organization Name (eg, company) [oldboy]:
Organizational Unit Name (eg, section) [oldboy]:
Common Name (eg, your name or your server's hostname) [oldboy CA]:
Email Address [1441107787@qq.com]:
[root@localhost 2.0]# ls keys/
ca.crt ca.key index.txt serial
6)生成服务器端证书和秘钥key文件:
[root@localhost 2.0]# pwd
/data/application/openvpn/openvpn-2.0.9/easy-rsa/2.0
[root@localhost 2.0]# ls
build-ca build-key build-key-server clean-all list-crl openssl.cnf revoke-full vars.bak
build-dh build-key-pass build-req inherit-inter Makefile pkitool sign-req whichopensslcnf
build-inter build-key-pkcs12 build-req-pass keys openssl-0.9.6.cnf README vars
[root@localhost 2.0]# ./build-key-server server #服务端的秘钥文件给个名字叫server,不是必须要是这个名字,也可其他名字,为了规范,叫server。
Generating a 1024 bit RSA private key
………..++++++
…………….++++++
writing new private key to 'server.key'
—–
You are about to be asked to enter information that will be incorporated
into your certificate request.
What you are about to enter is what is called a Distinguished Name or a DN.
There are quite a few fields but you can leave some blank
For some fields there will be a default value,
If you enter '.', the field will be left blank.
—–
Country Name (2 letter code) [CN]:
State or Province Name (full name) [BJ]:
Locality Name (eg, city) [Beijing]:
Organization Name (eg, company) [oldboy]:
Organizational Unit Name (eg, section) [oldboy]:
Common Name (eg, your name or your server's hostname) [server]:
Email Address [1441107787@qq.com]:
Please enter the following 'extra' attributes
to be sent with your certificate request
A challenge password []:123456 #发送证书请求时会要求的一个密码
An optional company name []:oldboy #可选的公司名
Using configuration from /data/application/openvpn/openvpn-2.0.9/easy-rsa/2.0/openssl.cnf
Check that the request matches the signature
Signature ok
The Subject's Distinguished Name is as follows
countryName :PRINTABLE:'CN'
stateOrProvinceName :PRINTABLE:'BJ'
localityName :PRINTABLE:'Beijing'
organizationName :PRINTABLE:'oldboy'
organizationalUnitName:PRINTABLE:'oldboy'
commonName :PRINTABLE:'server'
emailAddress :IA5STRING:'1441107787@qq.com'
Certificate is to be certified until May 30 06:54:05 2028 GMT (3650 days)
Sign the certificate? [y/n]:y
1 out of 1 certificate requests certified, commit? [y/n]y
Write out database with 1 new entries
Data Base Updated
[root@localhost 2.0]# ls keys/
01.pem ca.crt ca.key index.txt index.txt.attr index.txt.old serial serial.old server.crt server.csr server.key
7)生成客户端证书和key文件:
[root@localhost 2.0]# pwd
/data/application/openvpn/openvpn-2.0.9/easy-rsa/2.0
[root@localhost 2.0]# ls
build-ca build-key build-key-server clean-all list-crl openssl.cnf revoke-full vars.bak
build-dh build-key-pass build-req inherit-inter Makefile pkitool sign-req whichopensslcnf
build-inter build-key-pkcs12 build-req-pass keys openssl-0.9.6.cnf README vars
[root@localhost 2.0]# ./build-key test
Generating a 1024 bit RSA private key
…………………++++++
………….++++++
writing new private key to 'test.key'
—–
You are about to be asked to enter information that will be incorporated
into your certificate request.
What you are about to enter is what is called a Distinguished Name or a DN.
There are quite a few fields but you can leave some blank
For some fields there will be a default value,
If you enter '.', the field will be left blank.
—–
Country Name (2 letter code) [CN]:
State or Province Name (full name) [BJ]:
Locality Name (eg, city) [Beijing]:
Organization Name (eg, company) [oldboy]:
Organizational Unit Name (eg, section) [oldboy]:
Common Name (eg, your name or your server's hostname) [test]:
Email Address [1441107787@qq.com]:
Please enter the following 'extra' attributes
to be sent with your certificate request
A challenge password []:123456
An optional company name []:oldboy
Using configuration from /data/application/openvpn/openvpn-2.0.9/easy-rsa/2.0/openssl.cnf
Check that the request matches the signature
Signature ok
The Subject's Distinguished Name is as follows
countryName :PRINTABLE:'CN'
stateOrProvinceName :PRINTABLE:'BJ'
localityName :PRINTABLE:'Beijing'
organizationName :PRINTABLE:'oldboy'
organizationalUnitName:PRINTABLE:'oldboy'
commonName :PRINTABLE:'test'
emailAddress :IA5STRING:'1441107787@qq.com'
Certificate is to be certified until May 30 07:04:31 2028 GMT (3650 days)
Sign the certificate? [y/n]:y
1 out of 1 certificate requests certified, commit? [y/n]y
Write out database with 1 new entries
Data Base Updated
[root@localhost 2.0]# ls keys
01.pem ca.crt index.txt index.txt.attr.old serial server.crt server.key test.csr
02.pem ca.key index.txt.attr index.txt.old serial.old server.csr test.crt test.key
8)生成传输进行秘钥交换时用到的交互秘钥协议文件:(该步骤不能省略,否则出错)
[root@localhost 2.0]# pwd
/data/application/openvpn/openvpn-2.0.9/easy-rsa/2.0
[root@localhost 2.0]# ls
build-ca build-key build-key-server clean-all list-crl openssl.cnf revoke-full vars.bak
build-dh build-key-pass build-req inherit-inter Makefile pkitool sign-req whichopensslcnf
build-inter build-key-pkcs12 build-req-pass keys openssl-0.9.6.cnf README vars
[root@localhost 2.0]# ./build-dh
[root@localhost 2.0]# ls keys/
01.pem ca.crt dh1024.pem index.txt.attr index.txt.old serial.old server.csr test.crt test.key
02.pem ca.key index.txt index.txt.attr.old serial server.crt server.key test.csr
9)生成一个防止恶意攻击(如Ddos、Udp port flooding)的文件:ta.key,效果不太好说。
[root@localhost 2.0]# pwd
/data/application/openvpn/openvpn-2.0.9/easy-rsa/2.0
[root@localhost 2.0]# openvpn –genkey –secret keys/ta.key
[root@localhost 2.0]# ls keys/
01.pem ca.crt dh1024.pem index.txt.attr index.txt.old serial.old server.csr ta.key test.csr
02.pem ca.key index.txt index.txt.attr.old serial server.crt server.key test.crt test.key
[root@localhost 2.0]# cd
openvpn服务端几个重要命令解释:脚本路径:/data/application/openvpn/openvpn-2.0.9/easy-rsa/2.0/
vars脚本: 用来创建环境变量,设置所需要的的变量的脚本。
clean-all脚本: 创建生成ca证书及秘钥文件所需要的文件及目录
build-ca脚本: 生成ca证书(交互)
build-dh脚本: 生成Diffie-Hellman文件(交互)
build-key-server脚本: 生成服务器端秘钥(交互)
build-key脚本: 生成客户端秘钥(交互)
build-key-pass脚本:生成客户端带密码的秘钥(交互)
pkitool脚本: 直接使用vars的环境变量设置,直接生成证书(非交互)
10)vpn配置文件整理:
[root@localhost ~]# mkdir /etc/openvpn
[root@localhost ~]# cp -a /data/application/openvpn/openvpn-2.0.9/easy-rsa/2.0/keys/ /etc/openvpn/
[root@localhost ~]# cp -a /data/application/openvpn/openvpn-2.0.9/sample-config-files/server.conf /etc/openvpn/
[root@localhost ~]# cp -a /data/application/openvpn/openvpn-2.0.9/sample-config-files/client.conf /etc/openvpn/
[root@localhost ~]# ls /etc/openvpn/
client.conf keys server.conf
[root@localhost ~]# ls /etc/openvpn/keys/
01.pem ca.crt dh1024.pem index.txt.attr index.txt.old serial.old server.csr ta.key test.csr
02.pem ca.key index.txt index.txt.attr.old serial server.crt server.key test.crt test.key
[root@localhost ~]# cd /etc/openvpn/
[root@localhost openvpn]# ls
client.conf keys server.conf
[root@localhost openvpn]# cp server.conf server.conf.bak
[root@localhost openvpn]# grep -vE ";|#|^$" server.conf
port 1194
proto udp
dev tun
ca ca.crt
cert server.crt
dh dh1024.pem
server 10.8.0.0 255.255.255.0
ifconfig-pool-persist ipp.txt
keepalive 10 120
comp-lzo
persist-key
persist-tun
status openvpn-status.log
verb 3
[root@localhost openvpn]# grep -vE ";|#|^$" server.conf > tmp.log
[root@localhost openvpn]# cat tmp.log > server.conf
[root@localhost openvpn]# vim server.conf #编辑修改,增删后最终结果如下:
local 192.168.43.128
port 52115
proto tcp
dev tun
ca /etc/openvpn/keys/ca.crt
cert /etc/openvpn/keys/server.crt
key /etc/openvpn/keys/server.key
dh /etc/openvpn/keys/dh1024.pem
server 10.8.0.0 255.255.255.0 #vpn server动态分配给vpn client的地址池
push "route 172.16.1.0 255.255.255.0" #多个内网段就都添加进去(包括其他内网服务器内网段),每个网段一行
ifconfig-pool-persist ipp.txt
keepalive 10 120
comp-lzo
persist-key
persist-tun
status openvpn-status.log
verb 3
client-to-client
duplicate-cn
log /var/log/openvpn.log
[root@localhost openvpn]# cd
解释:
local 192.168.43.128 (vpn外网IP ) #openvpn监听的ip地址,若是*,所有网卡的ip都监听
port 52115 (默认1194) #openvpn监听的端口
proto tcp(默认udp) #指定监听的协议,推荐tcp
dev tun #采用的路由模式
ca /etc/openvpn/keys/ca.crt #ca证书,可以相对路径(和server.conf在同一个目录),也可绝对路径
cert /etc/openvpn/keys/server.crt #服务端的证书,可以相对路径,也可绝对路径
key /etc/openvpn/keys/server.key #服务端的秘钥文件,可以相对路径,也可绝对路径
dh /etc/openvpn/keys/dh1024.pem #秘钥交换文件
server 10.8.0.0 255.255.255.0 #是客户端拨号后,vpn server动态分配给vpn client的地址池,一般不需更改,不要和任何地址段冲突或重复
push "route 172.16.1.0 255.255.255.0" #vpn服务端推送到client端的路由,在vpn的客户端上面配置这么一个路由,即vpnserver端的内网网段,多个内网段时,就添加多行,即使vpnserver只有一个内网,但如果有其他内网服务器网段也都添加进去,这样其他服务器才能通过vpn连接
ifconfig-pool-persist ipp.txt
keepalive 10 120 #每10秒ping一次,若是120秒未收到包,即认定客户端断线
comp-lzo #开启压缩功能
persist-key #当vpn超时后,当重新启动vpn后,保持上一次使用的私钥,而不重新读取私钥
persist-tun #通过keepalive检测vpn超时后,当重新启动vpn后,保持tun或者tap设备自动连接状态
status openvpn-status.log #openvpn日志状态信息
verb 3 #指定日志文件冗余
client-to-client #允许拨号的多个vpn client互相通信
duplicate-cn #允许多个客户端使用同一个账号连接
log /var/log/openvpn.log #日志文件
11)调试服务器vpn服务启动环境:
[root@localhost ~]# iptables -I INPUT -p tcp –dport 52115 -j ACCEPT
[root@localhost ~]# /etc/init.d/iptables save
[root@localhost ~]# /etc/init.d/iptables restart
[root@localhost ~]# iptables -nL
Chain INPUT (policy ACCEPT)
target prot opt source destination
ACCEPT tcp — 0.0.0.0/0 0.0.0.0/0 tcp dpt:52115
Chain FORWARD (policy ACCEPT)
target prot opt source destination
Chain OUTPUT (policy ACCEPT)
target prot opt source destination
[root@localhost ~]# setenforce 0 测试是开着也不影响,尽量关掉吧
[root@localhost ~]# vim /etc/sysctl.conf #开启路由转发
net.ipv4.ip_forward = 1
[root@localhost ~]# sysctl -p
12)启动openvpn服务并检查:
启动方法1:
[root@localhost ~]# /usr/local/sbin/openvpn –config /etc/openvpn/server.conf & #启动openvpn
[1] 24419
[root@localhost ~]# netstat -anput |grep 52115
tcp 0 0 192.168.43.128:52115 0.0.0.0:* LISTEN 24419/openvpn
[root@localhost ~]# ps -ef |grep openvpn
root 24419 23849 0 17:07 pts/1 00:00:00 /usr/local/sbin/openvpn –config /etc/openvpn/server.conf
root 24431 23849 0 17:07 pts/1 00:00:00 grep openvpn
[root@localhost ~]# ifconfig openvpn启动后,会多一个虚拟网卡tun0
eth0 Link encap:Ethernet HWaddr 00:0C:29:E1:54:C6
inet addr:192.168.43.128 Bcast:192.168.43.255 Mask:255.255.255.0
inet6 addr: fe80::20c:29ff:fee1:54c6/64 Scope:Link
UP BROADCAST RUNNING MULTICAST MTU:1500 Metric:1
RX packets:78038 errors:0 dropped:0 overruns:0 frame:0
TX packets:30843 errors:0 dropped:0 overruns:0 carrier:0
collisions:0 txqueuelen:1000
RX bytes:97192097 (92.6 MiB) TX bytes:3093244 (2.9 MiB)
eth1 Link encap:Ethernet HWaddr 00:0C:29:E1:54:D0
inet addr:172.16.1.28 Bcast:172.16.1.255 Mask:255.255.255.0
inet6 addr: fe80::20c:29ff:fee1:54d0/64 Scope:Link
UP BROADCAST RUNNING MULTICAST MTU:1500 Metric:1
RX packets:4 errors:0 dropped:0 overruns:0 frame:0
TX packets:14 errors:0 dropped:0 overruns:0 carrier:0
collisions:0 txqueuelen:1000
RX bytes:316 (316.0 b) TX bytes:916 (916.0 b)
lo Link encap:Local Loopback
inet addr:127.0.0.1 Mask:255.0.0.0
inet6 addr: ::1/128 Scope:Host
UP LOOPBACK RUNNING MTU:16436 Metric:1
RX packets:0 errors:0 dropped:0 overruns:0 frame:0
TX packets:0 errors:0 dropped:0 overruns:0 carrier:0
collisions:0 txqueuelen:0
RX bytes:0 (0.0 b) TX bytes:0 (0.0 b)
tun0 Link encap:UNSPEC HWaddr 00-00-00-00-00-00-00-00-00-00-00-00-00-00-00-00
inet addr:10.8.0.1 P-t-P:10.8.0.2 Mask:255.255.255.255
UP POINTOPOINT RUNNING NOARP MULTICAST MTU:1500 Metric:1
RX packets:0 errors:0 dropped:0 overruns:0 frame:0
TX packets:0 errors:0 dropped:0 overruns:0 carrier:0
collisions:0 txqueuelen:100
RX bytes:0 (0.0 b) TX bytes:0 (0.0 b)
[root@localhost ~]# ps -ef |grep openvpn
root 24419 23849 0 17:07 pts/1 00:00:00 /usr/local/sbin/openvpn –config /etc/openvpn/server.conf
root 24448 23849 0 17:16 pts/1 00:00:00 grep openvpn
[root@localhost ~]# kill -9 24419 #停止openvpn,或者pkill openvpn
[root@localhost ~]# ps -ef |grep openvpn
root 24455 23849 0 17:17 pts/1 00:00:00 grep openvpn
启动方法2:(常规方式启动)
[root@localhost ~]# cp /data/application/openvpn/openvpn-2.0.9/sample-scripts/openvpn.init /etc/init.d/openvpn
[root@localhost ~]# chmod 700 /etc/init.d/openvpn
[root@localhost ~]# chkconfig –add openvpn
[root@localhost ~]# chkconfig –list openvpn
openvpn 0:off 1:off 2:off 3:on 4:on 5:on 6:off
[root@localhost ~]# vim /etc/init.d/openvpn
# Start every .conf in $work and run .sh if exists
errors=0
successes=0
for c in `/bin/ls server.conf 2>/dev/null`; do #之前默认是*,修改成server,若/etc/openvpn/下只有一个server.conf,此处不改也行
bn=${c%%.conf}
if [ -f "$bn.sh" ]; then
. $bn.sh
fi
rm -f $piddir/$bn.pid
$openvpn –daemon –writepid $piddir/$bn.pid –config $c –cd $work
…..
[root@localhost ~]# /etc/init.d/openvpn start
Starting openvpn: [ OK ]
[root@localhost ~]# netstat -anput |grep 52115
tcp 0 0 192.168.43.128:52115 0.0.0.0:* LISTEN 24529/openvpn
[root@localhost ~]# ps -ef |grep openvpn
root 24529 1 0 17:22 ? 00:00:00 /usr/local/sbin/openvpn –daemon –writepid /var/run/openvpn/server.pid –config server.conf –cd /etc/openvpn
root 24535 23849 0 17:23 pts/1 00:00:00 grep openvpn
[root@localhost ~]# /etc/init.d/openvpn stop
Shutting down openvpn: [ OK ]
[root@localhost ~]# netstat -anput |grep 52115
无
[root@localhost ~]# ps -ef |grep openvpn
root 24553 23849 0 17:24 pts/1 00:00:00 grep openvpn
[root@localhost ~]# /etc/init.d/openvpn start
Starting openvpn: [ OK ]
[root@localhost ~]# netstat -anput |grep 52115
tcp 0 0 192.168.43.128:52115 0.0.0.0:* LISTEN 24569/openvpn
2.windows安装openvpn客户端并进行远程拨号:(此处安装版本是:openvpn-install-2.4.1-I601.exe也可其他版本)
安装openvpn客户端:openvpn-install-2.4.1-I601略(一直下一步即可)
安装完如下:

配置openvpn 客户端并远程拨号到vpnserver端:
登录openvpn服务端下载客户端相关需要的证书和文件:
[root@localhost ~]# cd /data/application/openvpn/openvpn-2.0.9/easy-rsa/2.0/keys/
[root@localhost keys]# ls
01.pem ca.crt dh1024.pem index.txt.attr index.txt.old serial.old server.csr ta.key test.csr
02.pem ca.key index.txt index.txt.attr.old serial server.crt server.key test.crt test.key
[root@localhost keys]# sz -y ca.crt test.crt test.key 下载到桌面
[root@localhost keys]# sz /etc/openvpn/client.conf 下载到桌面

在openvpn客户端的安装目录的config下面建立一个文件夹:test,如下:(该几个文件只要放在config目录下即可(可递归)),如下图:

根据client.conf(没用,作为对比用)文件,建立一个连接文件文本,以ovpn结尾的文件,内容如下:

客户端开始远程拨号:
双击OpenVPN GUI图标运行软件——右下角vpn图标右击——选择需要连接的vpn名称test(配置了连接多个vpn server时,每个连接的名字就是ovpv文件对应的名字,当配置只连接一个vpn server时候,就默认只有connect,此处是配置了连接多个vpn server时候)——点击connet

点击connect,如下:

连接成功后,如下图:

使用xshell连接内网服务器:172.16.1.17 内网(vmnet2)

如果断开vpn,则连接不了。
3.在vpnserver服务器上查看某用户是否拨号到该vpn,查看用户使用vpn情况:(判断离职人员是否使用vpn)
[root@localhost ~]# cat /etc/openvpn/openvpn-status.log
OpenVPN CLIENT LIST
Updated,Sat Jun 2 22:02:07 2018
Common Name,Real Address,Bytes Received,Bytes Sent,Connected Since
test,192.168.43.1:63352,8215,4730,Sat Jun 2 21:58:43 2018
ROUTING TABLE
Virtual Address,Common Name,Real Address,Last Ref
10.8.0.6,test,192.168.43.1:63352,Sat Jun 2 21:58:44 2018 #查看vpn给客户端分的IP地址,客户端名字,客户端本地IP
GLOBAL STATS
Max bcast/mcast queue length,0
END
4.内网服务器的基本信息:172.16.1.17 内网(vmnet2)
5.确保客户端远程拨号能成功的前提方法选择: (选择其一即可)
方法1:内网服务器:172.16.1.17 配置内网服务器的网关: 地址为openvpn server的内网地址172.16.1.28,如图:

方法2:内网服务器:172.16.1.17不用 配置内网服务器的网关,而在vpnserver上配置源地址转发规则:
内网服务器如下:
openvpnserver服务器上配置nat转发规则:
[root@localhost ~]# /etc/init.d/iptables start
[root@localhost ~]# iptables -I INPUT -p tcp –dport 52115 -j ACCEPT 1)端口允许
[root@localhost ~]# iptables -nL
Chain INPUT (policy ACCEPT)
target prot opt source destination
ACCEPT tcp — 0.0.0.0/0 0.0.0.0/0 tcp dpt:52115
Chain FORWARD (policy ACCEPT) 2)FORWARD 要允许
target prot opt source destination
Chain OUTPUT (policy ACCEPT)
target prot opt source destination
[root@localhost ~]# iptables -t nat -I POSTROUTING -s 10.8.0.0/24 -j SNAT –to-source 172.16.1.28
#即:源地址转换,源地址是vpn server动态分配给vpn client的地址池的IP转换为vpnserver的内网IP
或:iptables -t nat -I POSTROUTING -s 10.8.0.0/24 -j MASQUERADE #若后面的地址不固定,可用该条
[root@localhost ~]# iptables -t nat -nL
Chain PREROUTING (policy ACCEPT)
target prot opt source destination
Chain POSTROUTING (policy ACCEPT)
target prot opt source destination
SNAT all — 10.8.0.0/24 0.0.0.0/0 to:172.16.1.28
Chain OUTPUT (policy ACCEPT)
target prot opt source destination
[root@localhost ~]# /etc/init.d/iptables save
iptables: Saving firewall rules to /etc/sysconfig/iptables:[ OK ]
6.openvpn吊销用户证书,禁止该用户拨号到vpnserver
在openvpn server上:
[root@localhost ~]# cd /data/application/openvpn/openvpn-2.0.9/easy-rsa/2.0/
[root@localhost 2.0]# ls
build-ca build-key build-key-server clean-all list-crl openssl.cnf revoke-full vars.bak
build-dh build-key-pass build-req inherit-inter Makefile pkitool sign-req whichopensslcnf
build-inter build-key-pkcs12 build-req-pass keys openssl-0.9.6.cnf README vars
[root@localhost 2.0]# ls keys/
01.pem ca.crt dh1024.pem index.txt.attr index.txt.old serial.old server.csr ta.key test.csr
02.pem ca.key index.txt index.txt.attr.old serial server.crt server.key test.crt test.key
[root@localhost 2.0]# source vars
NOTE: If you run ./clean-all, I will be doing a rm -rf on /data/application/openvpn/openvpn-2.0.9/easy-rsa/2.0/keys
[root@localhost 2.0]# ./revoke-full test #吊销某用户openvpn凭证,防止用户登录vpn
Using configuration from /data/application/openvpn/openvpn-2.0.9/easy-rsa/2.0/openssl.cnf
error on line 282 of config file '/data/application/openvpn/openvpn-2.0.9/easy-rsa/2.0/openssl.cnf'
139869544200008:error:0E065068:configuration file routines:STR_COPY:variable has no value:conf_def.c:618:line 282
Using configuration from /data/application/openvpn/openvpn-2.0.9/easy-rsa/2.0/openssl.cnf
error on line 282 of config file '/data/application/openvpn/openvpn-2.0.9/easy-rsa/2.0/openssl.cnf' #吊销凭证失败
140526850815816:error:0E065068:configuration file routines:STR_COPY:variable has no value:conf_def.c:618:line 282
cat: crl.pem: No such file or directory
test.crt: C = CN, ST = BJ, L = Beijing, O = oldboy, OU = oldboy, CN = test, emailAddress = 1441107787@qq.com
error 3 at 0 depth lookup:unable to get certificate CRL
[root@localhost 2.0]# ls
build-ca build-key build-key-server clean-all list-crl openssl.cnf revoke-full vars.bak
build-dh build-key-pass build-req inherit-inter Makefile pkitool sign-req whichopensslcnf
build-inter build-key-pkcs12 build-req-pass keys openssl-0.9.6.cnf README vars
[root@localhost 2.0]# vim openssl.cnf
……..#最下面的几行注释掉
[ pkcs11_section ]
#engine_id = pkcs11
#dynamic_path = /usr/lib/engines/engine_pkcs11.so
#MODULE_PATH = $ENV::PKCS11_MODULE_PATH
#PIN = $ENV::PKCS11_PIN
#init = 0
[root@localhost 2.0]# source vars
NOTE: If you run ./clean-all, I will be doing a rm -rf on /data/application/openvpn/openvpn-2.0.9/easy-rsa/2.0/keys
[root@localhost 2.0]# ./revoke-full test #再次执行吊销某用户命令,一定要保证openvpn服务是运行状态,命令才能成功
Using configuration from /data/application/openvpn/openvpn-2.0.9/easy-rsa/2.0/openssl.cnf
Revoking Certificate 02.
Data Base Updated
Using configuration from /data/application/openvpn/openvpn-2.0.9/easy-rsa/2.0/openssl.cnf
test.crt: C = CN, ST = BJ, L = Beijing, O = oldboy, OU = oldboy, CN = test, emailAddress = 1441107787@qq.com
error 8 at 0 depth lookup:CRL signature failure
140013267683144:error:0D0C50A1:asn1 encoding routines:ASN1_item_verify:unknown message digest algorithm:a_verify.c:217:
[root@localhost 2.0]# ls
build-ca build-key build-key-server clean-all list-crl openssl.cnf revoke-full vars.bak
build-dh build-key-pass build-req inherit-inter Makefile pkitool sign-req whichopensslcnf
build-inter build-key-pkcs12 build-req-pass keys openssl-0.9.6.cnf README vars
[root@localhost 2.0]# ls keys/ #吊销用户凭证后,会在keys目录下生成一个crl.pem文件,里面就是注销掉的证书,并没完全注销掉,可恢复
01.pem ca.crt crl.pem index.txt index.txt.attr.old revoke-test.pem serial.old server.csr ta.key test.csr
02.pem ca.key dh1024.pem index.txt.attr index.txt.old serial server.crt server.key test.crt test.key
[root@localhost 2.0]# cat keys/crl.pem
—–BEGIN X509 CRL—–
MIIBYDCByjANBgkqhkiG9w0BAQQFADCBhDELMAkGA1UEBhMCQ04xCzAJBgNVBAgT
AkJKMRAwDgYDVQQHEwdCZWlqaW5nMQ8wDQYDVQQKEwZvbGRib3kxDzANBgNVBAsT
Bm9sZGJveTESMBAGA1UEAxMJb2xkYm95IENBMSAwHgYJKoZIhvcNAQkBFhExNDQx
MTA3Nzg3QHFxLmNvbRcNMTgwNjAyMTQ0MjAzWhcNMTgwNzAyMTQ0MjAzWjAUMBIC
AQIXDTE4MDYwMjE0NDIwM1owDQYJKoZIhvcNAQEEBQADgYEAjossR3MAZAStqlk2
71IG/9NMb/42o6KDLsmlxwWKWmrbRqR1DhkEgnxAo1KgsDERluPOrg7n3Dx648GX
pPNGazMz1GTIvAVfziYydHwc0Ics2lERhvOJ2cDGIzfdSSnWJL0qRxDiH4Ss0mm+
xg3PwUOc/lNCKd2qkhHdDX1yhyE=
—–END X509 CRL—–
[root@localhost 2.0]# cat keys/index.txt #再次确认该用户吊销,里面是R的状态表示该用户吊销
V 280530065405Z 01 unknown /C=CN/ST=BJ/L=Beijing/O=oldboy/OU=oldboy/CN=server/emailAddress=1441107787@qq.com
R 280530070431Z 180602144203Z 02 unknown /C=CN/ST=BJ/L=Beijing/O=oldboy/OU=oldboy/CN=test/emailAddress=1441107787@qq.com
为了彻底吊销该用户凭证,需要在openvpn的配置文件server.conf中添加:
[root@localhost 2.0]# echo "crl-verify /data/application/openvpn/openvpn-2.0.9/easy-rsa/2.0/keys/crl.pem" >> /etc/openvpn/server.conf
[root@localhost 2.0]# tail -2 /etc/openvpn/server.conf
log /var/log/openvpn.log
crl-verify /data/application/openvpn/openvpn-2.0.9/easy-rsa/2.0/keys/crl.pem
[root@localhost 2.0]# /etc/init.d/openvpn stop
[root@localhost 2.0]# ps -ef |grep openvpn
root 25725 1171 0 22:54 pts/0 00:00:00 grep openvpn
[root@localhost 2.0]# /etc/init.d/openvpn start
[root@localhost 2.0]# ps -ef |grep openvpn
root 25741 1 0 22:54 ? 00:00:00 /usr/local/sbin/openvpn –daemon –writepid /var/run/openvpn/server.pid –config server.conf –cd /etc/openvpn
root 25744 1171 0 22:54 pts/0 00:00:00 grep openvpn
此时windows客户端不能用test用户连接openvpn了:

点击connect后,无法连接,如下:

xshell也连接不上内网服务器:172.16.1.17

7.吊销用户的再次重新启用,恢复用户拨号到vpnserver
[root@localhost ~]# vim /etc/openvpn/server.conf
……..#最后添加的这行注释
#crl-verify /data/application/openvpn/openvpn-2.0.9/easy-rsa/2.0/keys/crl.pem
[root@localhost ~]# tail -3 /etc/openvpn/server.conf
duplicate-cn
log /var/log/openvpn.log
#crl-verify /data/application/openvpn/openvpn-2.0.9/easy-rsa/2.0/keys/crl.pem
[root@localhost ~]# /etc/init.d/openvpn stop
[root@localhost ~]# /etc/init.d/openvpn start
[root@localhost ~]# netstat -anptu |grep 52115
tcp 0 0 192.168.43.128:52115 0.0.0.0:* LISTEN 25815/openvpn
windows客户端重新连接openvpn:

点击connect,如下:


用xshell连接内网服务器:172.16.1.17 :能连接到内网服务器

如果对运维课程感兴趣,可以在b站上、csdn或微信视频号 上搜索我的账号: 运维实战课程,可以关注我,学习更多免费的运维实战技术视频


评论前必须登录!
注册