 网硕互联帮助中心
文章目录
-
- 前提条件
- 步骤 1:申请 SSL 证书并下载文件
- 步骤 2:上传证书文件到服务器
- 步骤 3:配置 Apache 使用 SSL 证书
- 步骤 4:启用 SSL 模块并启用站点配置
- 步骤 5:重启 Apache
- 步骤 6:检查 SSL 证书是否正常工作
- 步骤 7:配置 HTTP 自动重定向到 HTTPS(可选)
- 步骤 8:启用 HSTS(可选)
- 常见问题解决
- 完成
前提条件
- 一台已部署好网站的 Linux 服务器(例如 Ubuntu、CentOS)。-主页有课程
- 已安装并配置 Apache 服务器。-主页有课程
- 已申请的 SSL 证书(可以是阿里云或其他提供商的免费/付费 SSL 证书)。
步骤 1:申请 SSL 证书并下载文件
- example.key(私钥文件)
- example.crt(证书文件)
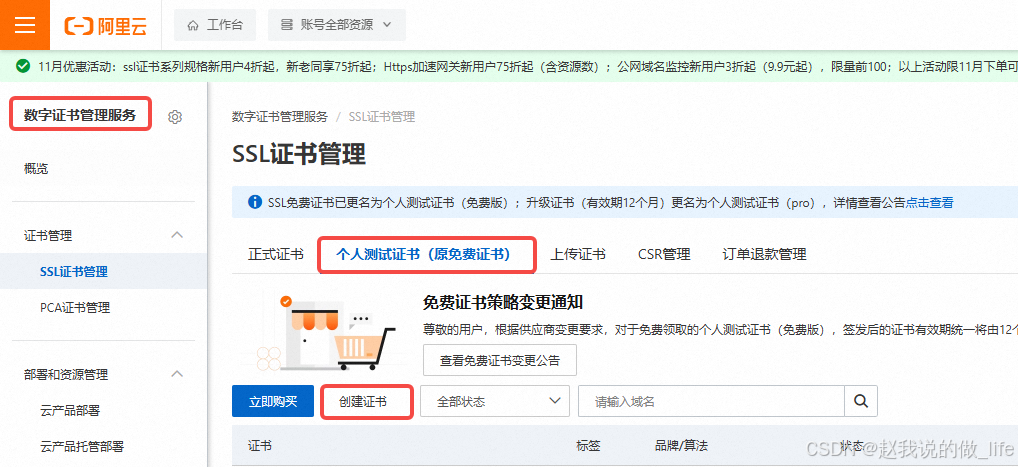
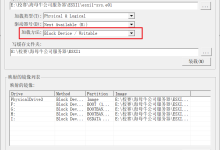
- example_chain.crt(证书链文件) 在个人测试证书中找到要部署的证书,点击后面的更多。
 如下图,点击下载,找到Apache后面的下载,下载后压缩包中包括:
- *.key
- *_chain.crt
- *_public.crt

步骤 2:上传证书文件到服务器
sudo chmod 600 /etc/httpd/cert/example.key
步骤 3:配置 Apache 使用 SSL 证书
如果目录下存在多个conf,不知道哪个在使用的话可以查看主页另一篇文章:《[菜鸟写的web教程]如何查找和管理 Apache 服务器的生效配置文件》
ServerAdmin webmaster@example.com
ServerName www.example.com—–自己的域名
ServerAlias example.com—–自己的域名
DocumentRoot /var/www/html/
SSLEngine on
SSLCertificateFile /etc/httpd/cert/example.crt—–自己的路径和文件
SSLCertificateKeyFile /etc/httpd/cert/example.key—–自己的路径和文件
SSLCertificateChainFile /etc/httpd/cert/example_chain.crt —–自己的路径和文件
<Directory /var/www/html/>
Options Indexes FollowSymLinks
AllowOverride All
Require all granted
</Directory>
ErrorLog ${APACHE_LOG_DIR}/example_error.log
CustomLog ${APACHE_LOG_DIR}/example_access.log combined
</VirtualHost>
这里需要注意,本系列课程中,前几篇文章里面这个文件中配置的端口是80,而HTTPS一般使用443。阿里云服务器中的安全策略中,需要打开443端口。
步骤 4:启用 SSL 模块并启用站点配置
步骤 5:重启 Apache
重启 Apache 服务以应用新的配置:
sudo systemctl restart apache2 # Ubuntu/Debian
sudo systemctl restart httpd # CentOS/RHEL
步骤 6:检查 SSL 证书是否正常工作
步骤 7:配置 HTTP 自动重定向到 HTTPS(可选)
为提高网站安全性,配置将所有 HTTP 请求重定向到 HTTPS:
ServerName www.example.com
ServerAlias example.com
Redirect permanent / https://www.example.com/
</VirtualHost>
步骤 8:启用 HSTS(可选)
HSTS(HTTP Strict Transport Security)会强制浏览器始终通过 HTTPS 访问站点,进一步提高安全性:
常见问题解决
完成
现在,你已经成功为 Apache 服务器配置了 SSL 证书,网站应能通过 https 安全访问! 


评论前必须登录!
注册